My GNS3 server is running on ESXi and was running out of space. I was not able to create new projects, add devices to existing projects and some of devices would turn off.
The process to increase the disk size in ESXi is very simple, with no data loss to my projects.
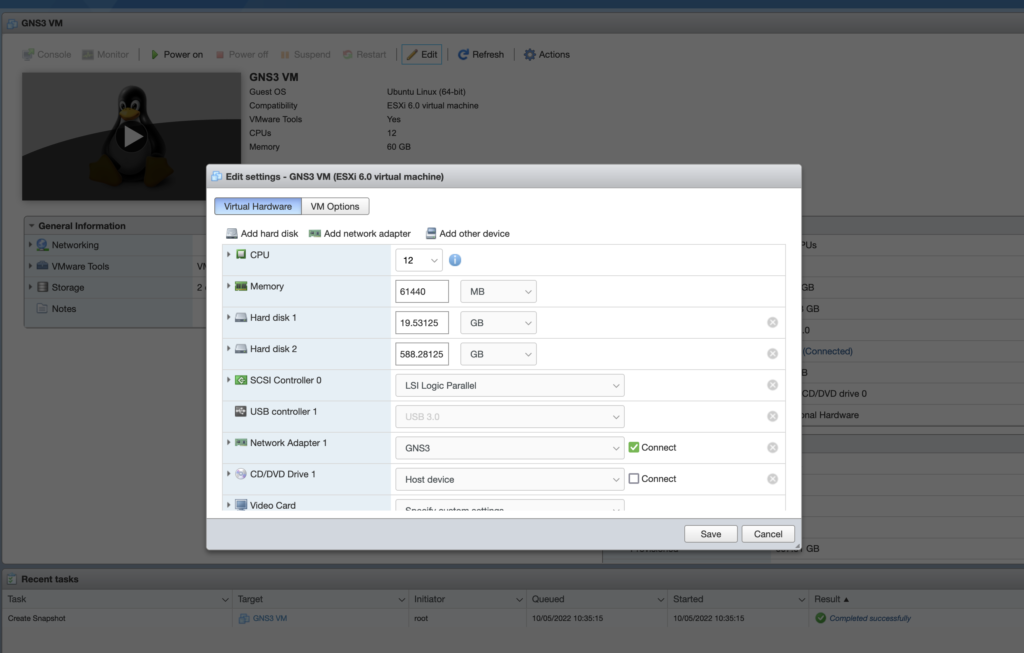
Increase Disk Size in ESXi
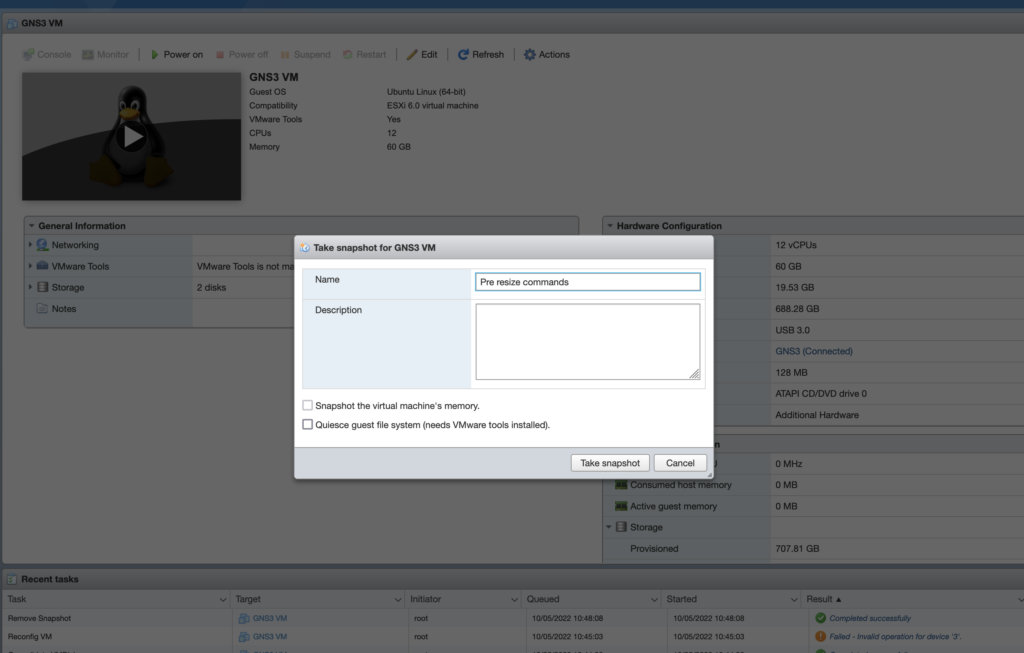
Delete all snapshots first! If not a deceptive error of “Failed to reconfigure virtual machine GNS3. Invalid operation for device ‘3’” is presented.
The deleting of my snapshots took quite a long time. But completed with no errors.
Now that the snapshots have been deleted the disk size can be increased. A snapshot will be created after the disk has been resized in ESXi.
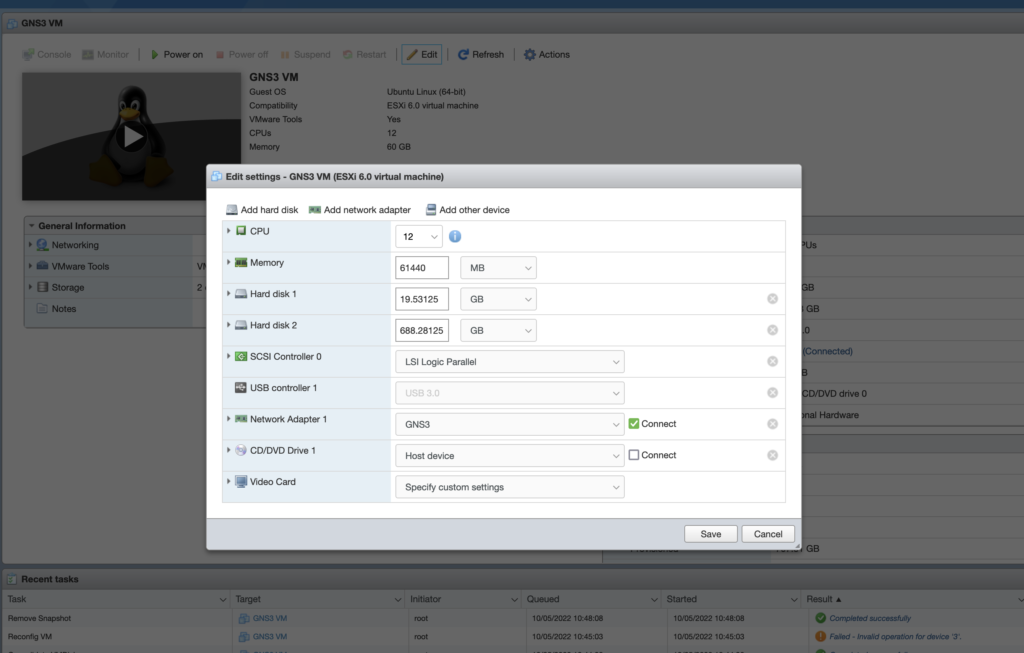
Take Snapshot
Now we can take a snapshot. This is made after the disk has been increased on the ESXi side, but before the disk is increased in Linux.
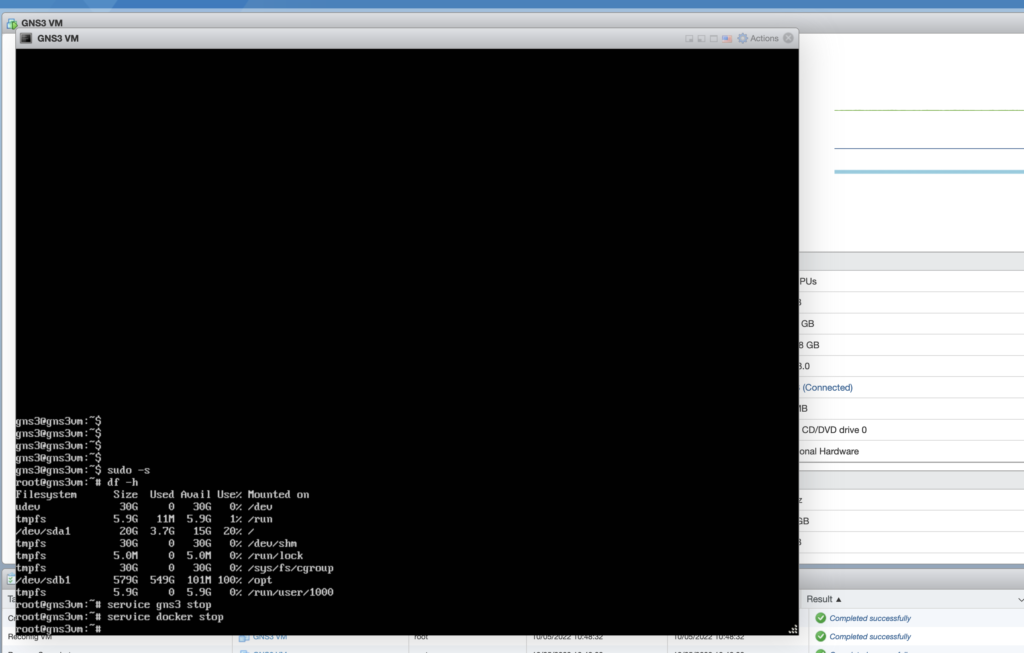
Start VM and Stop Services
Become root and stop running services
|
0 1 2 3 4 5 6 7 |
gns3@gns3vm:~$ sudo -s root@gns3vm:~# service gns3 stop gns3 stop/waiting root@gns3vm:~# service docker stop docker stop/waiting root@gns3vm:~# |
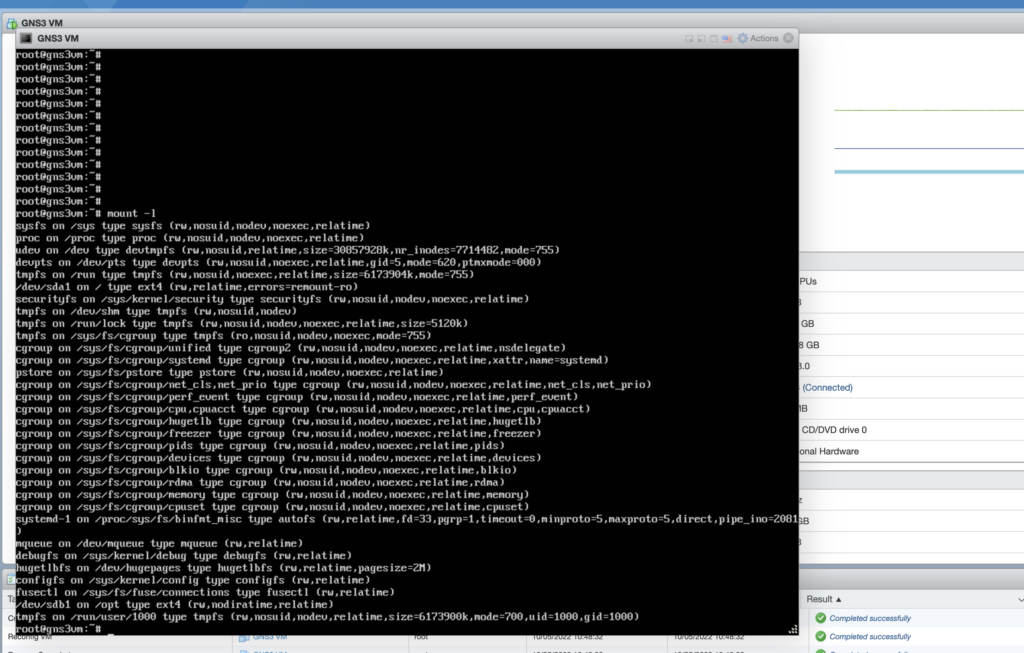
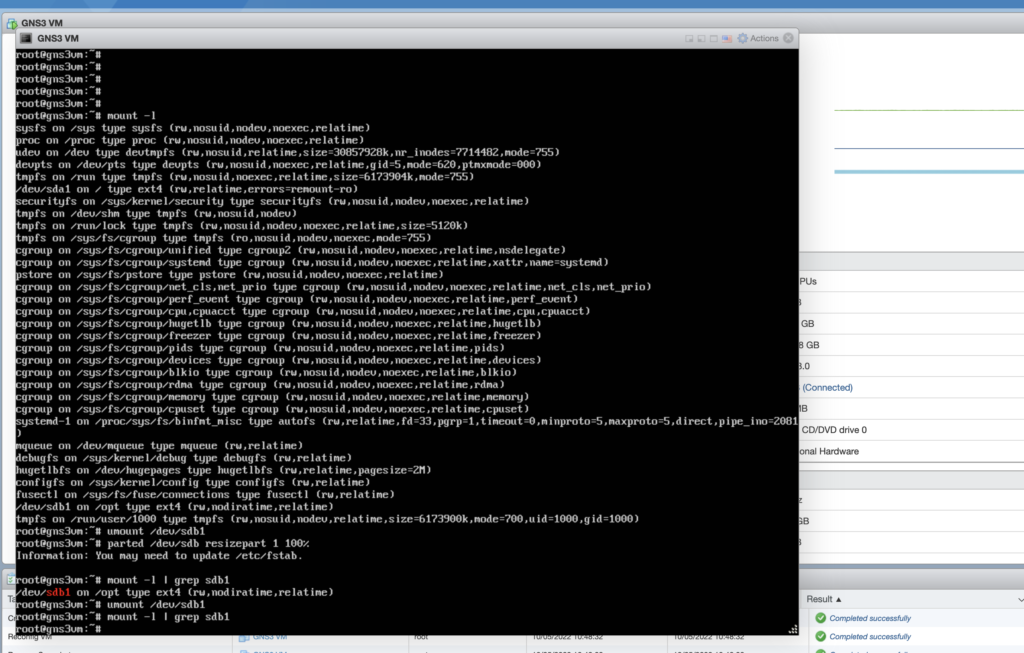
Unmount Disk and Expand Partition
First unmount the second hard disk, then use parted to expand the partition to the full size (100%).
It’s extremely important, that you use /dev/sdb in the parted command – NOT /dev/sdb1.
|
0 1 2 3 4 5 |
root@gns3vm:~# umount /dev/sdb1 root@gns3vm:~# parted /dev/sdb resizepart 1 100% Information: You may need to update /etc/fstab. root@gns3vm:~# |
May need to rerun umount again, as mine mounted after running parted. To check run mount -l
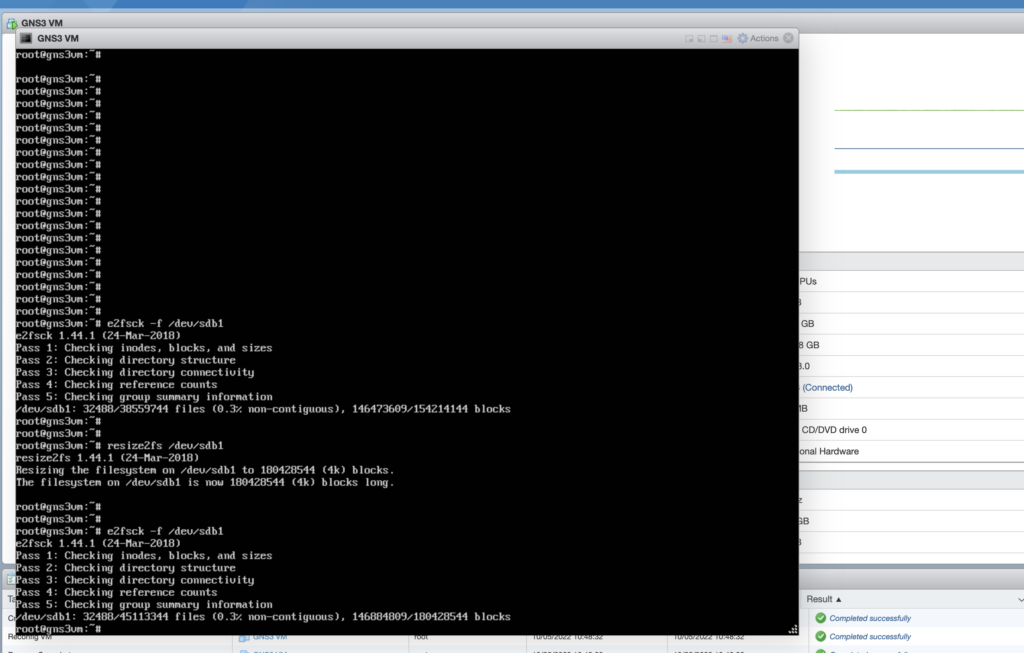
Expand File System within the Partition
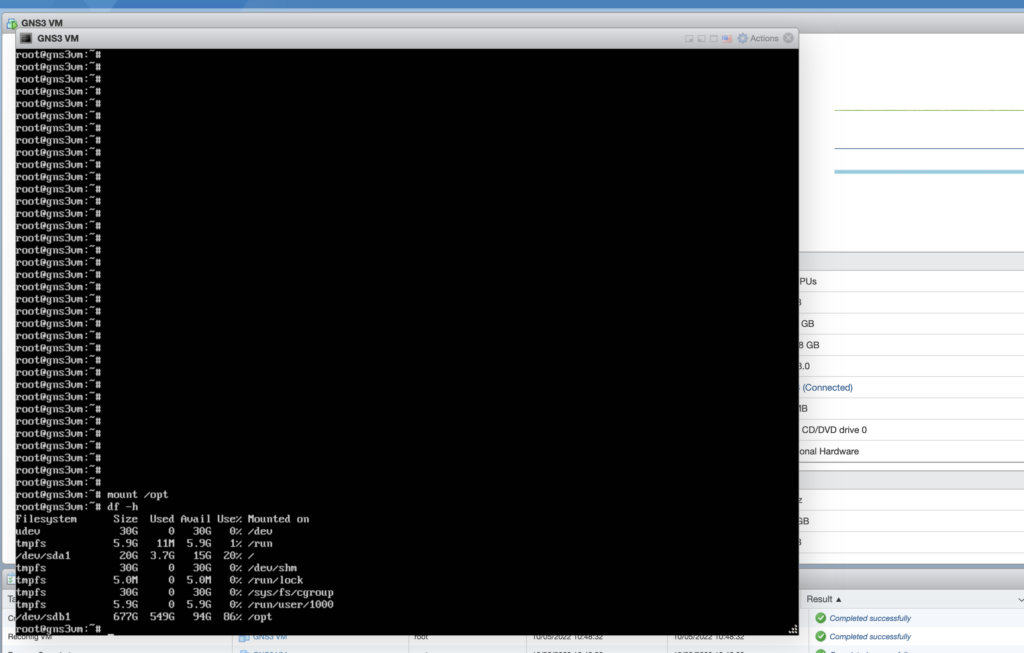
Check the file system structure, expand the file system, check the structure again, mount /opt.
Once done and the file size has been confirmed. Reboot the GNS3 server and done!
|
0 1 2 3 4 5 6 7 8 9 10 11 12 13 14 15 16 17 18 19 20 21 22 23 24 25 26 27 28 |
root@gns3vm:~# e2fsck -f /dev/sdb1 e2fsck 1.42.9 (4-Feb-2014) Pass 1: Checking inodes, blocks, and sizes Pass 2: Checking directory structure Pass 3: Checking directory connectivity Pass 4: Checking reference counts Pass 5: Checking group summary information /dev/sdb1: 17/6406144 files (0.0% non-contiguous), 21186104/25599744 blocks root@gns3vm:~# root@gns3vm:~# resize2fs /dev/sdb1 resize2fs 1.42.9 (4-Feb-2014) Resizing the filesystem on /dev/sdb1 to 104857344 (4k) blocks. The filesystem on /dev/sdb1 is now 104857344 blocks long. root@gns3vm:~# root@gns3vm:~# e2fsck -f /dev/sdb1 e2fsck 1.42.9 (4-Feb-2014) Pass 1: Checking inodes, blocks, and sizes Pass 2: Checking directory structure Pass 3: Checking directory connectivity Pass 4: Checking reference counts Pass 5: Checking group summary information /dev/sdb1: 17/26214400 files (0.0% non-contiguous), 22432031/104857344 blocks root@gns3vm:~# root@gns3vm:~# mount /opt |