
Just a quick how to for taking a flask app and putting it inside a docker container
Creating the Docker File
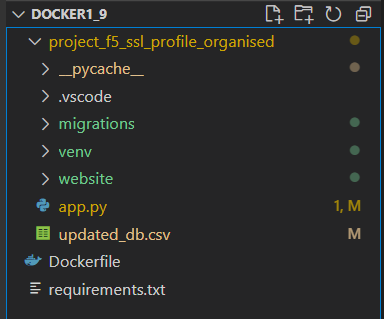
The Docker file is created in a parent directory of the flask app. This is where the Python version, the libraries used and the commands to run the app.
|
0 1 2 3 4 5 6 7 |
FROM python:3.10 WORKDIR /workdir COPY requirements.txt . RUN pip install -r requirements.txt COPY ./project_f5_ssl_profile_organised ./workdir CMD ["python", "./workdir/app.py"] |
Minor Changes to app.py
We do need to amend the app.py file before we do continue. That is to remove the debugging.
|
0 1 2 3 4 |
if __name__ == '__main__': # app.run(debug=True) app.run(host='0.0.0.0') |
Build Docker Container
Quite a few commands here to build and test the Docker container…
Build the container. This will download python and all the libraries needed that are in the requirements.txt file.
|
0 1 2 3 4 5 6 7 8 9 10 11 12 13 14 15 16 17 18 19 20 |
> docker build . -t f5_toolkitv1.9 PS ~\Docker\F5 Toolkit\Docker1_9> docker build . -t f5_toolkitv1.9 [+] Building 15.2s (3/9) => [internal] load build definition from Dockerfile 0.0s => => transferring dockerfile: 223B 0.0s => [internal] load .dockerignore 0.0s => => transferring context: 2B 0.0s => [internal] load metadata for docker.io/library/python:3.10 8.4s => [1/5] FROM docker.io/library/python:3.10@sha256:5bbf8c1d6f7c0946e405587c502f316239916caba98b2dd55a31f0fd465103dc 6.7s => => resolve docker.io/library/python:3.10@sha256:5bbf8c1d6f7c0946e405587c502f316239916caba98b2dd55a31f0fd465103dc 0.0s => => sha256:1671565cc8df8c365c9b661d3fbc164e73d01f1b0430c6179588428f99a9da2e 9.44MB / 55.01MB 6.5s => => sha256:4f9baf941f8e5b400c7905b316693ddfa423bfce3fc4ff1d1edb99887c5c86c3 8.53kB / 8.53kB 0.0s => => sha256:3e94d13e55e7a4ef17ff21376f57fb95c7e1706931f8704aa99260968d81f6e4 5.16MB / 5.16MB 3.8s => => sha256:5bbf8c1d6f7c0946e405587c502f316239916caba98b2dd55a31f0fd465103dc 2.35kB / 2.35kB 0.0s => => sha256:e36d71d42d9ddf851eca2d036b720f0dc81a260b1a2368c52888372a8595ab2a 2.22kB / 2.22kB 0.0s => => sha256:fa9c7528c685216129e8e67bf362a7702e7b1daa585ab85546a41508830657d6 10.88MB / 10.88MB 5.7s => => sha256:53ad072f9cd16fc8eb93b182b20e758e11acc0ef60babef0bf1043c08de1901a 3.15MB / 54.58MB 6.5s => => sha256:d6b983117533b718374f1701ef593d |
Test the newly built docker container
|
0 1 2 3 |
> docker run -d -p 8080:5000 f5_toolkitv1.9 60aab47d357ca360461def55a35d470bfbc4ca7c36ddaf5bf47a05dea558314a |
Save the newly built docker container
|
0 1 2 |
> docker save -o ./dockerimage.tar f5_toolkitv1.9 |
Tag the container with a version tag. Blank is for latest
|
0 1 2 3 4 |
> docker image tag f5_toolkitv1.9 docker.repository.test.com/f5_toolkitv1.9 > docker image tag [IMAGE NAME]:[VERSION TAG] docker.repository.test.com/[IMAGE NAME]:[VERSION TAG] |
Now we can see both docker containers. Different names, but both the same. The repo named one will be uploaded.
|
0 1 2 3 4 5 |
> docker images REPOSITORY TAG IMAGE ID CREATED SIZE f5_toolkitv1.9 latest 9489af3dbe5d 13 minutes ago 1.35GB docker.repository.test.com/f5_toolkitv1.9 latest 9489af3dbe5d 13 minutes ago 1.35GB |
This is to upload the container to a repo. This is not required to run the container. Just something to do if there is a central store of Docker containers. I will be using a server to pull the container down to and run it.
|
0 1 2 3 4 5 6 7 8 9 10 11 12 13 14 15 16 17 |
> docker image push docker.repository.test.com/f5_toolkitv1.9:latest The push refers to repository [docker.repository.test.com/f5_toolkitv1.9] 7e3e2e0909bb: Pushed 82d99fc3d581: Pushed 5e8bca19b2d3: Pushed 5670add321f2: Pushed 45dfa663a23e: Pushed e9a526601c2c: Pushed f25f9d09a4ed: Pushed 100796cdf3b1: Layer already exists 54acb5a6fa0b: Layer already exists 8d51c618126f: Layer already exists 9ff6e4d46744: Layer already exists a89d1d47b5a1: Layer already exists 655ed1b7a428: Layer already exists latest: digest: sha256:7241e94dad59cc1811dbbef2f002819ceaf4c95f0e6fb36649a1da65e30a6532 size: 3057 |
Once we are on a server that has access to the Docker repo we can download the image
|
0 1 2 3 4 5 6 7 8 9 10 11 12 13 14 15 16 |
> docker pull docker.repository.test.com/f5_toolkitv1.9:latest latest: Pulling from gns/f5_toolkitv1.9 1671565cc8df: Pull complete 3e94d13e55e7: Pull complete fa9c7528c685: Pull complete 53ad072f9cd1: Pull complete d6b983117533: Extracting [==============================================> ] 181.6MB/196.8MB d8092d56ded5: Download complete 102b77c1d556: Download complete c65fe89c654d: Download complete 18db97afaa16: Download complete 14b895e8a1b9: Download complete d6d3d0fe1198: Download complete 3d6f8d974c98: Download complete eb5f013cc579: Download complete |
Now it’s on the server. We can look at running the container.
Before this though as it is Flask it will run on port 5000 by default. We need to see if anything is running on that port or anything else we may want to use.
|
0 1 2 3 4 |
> netstat -plnt | grep 8080 > netstat -plnt | grep 3306 tcp 0 0 0.0.0.0:3306 0.0.0.0:* LISTEN 900094/docker-proxy |
Run the container on port 8080.
|
0 1 2 3 4 5 |
> docker run -d -p 8080:5000 docker.repository.test.com/f5_toolkitv1.9 55066ae74cc8e2c05290808a46422d2fc3e0e1794385fbb33dcde22ec2a49e9d localport:flaskport |
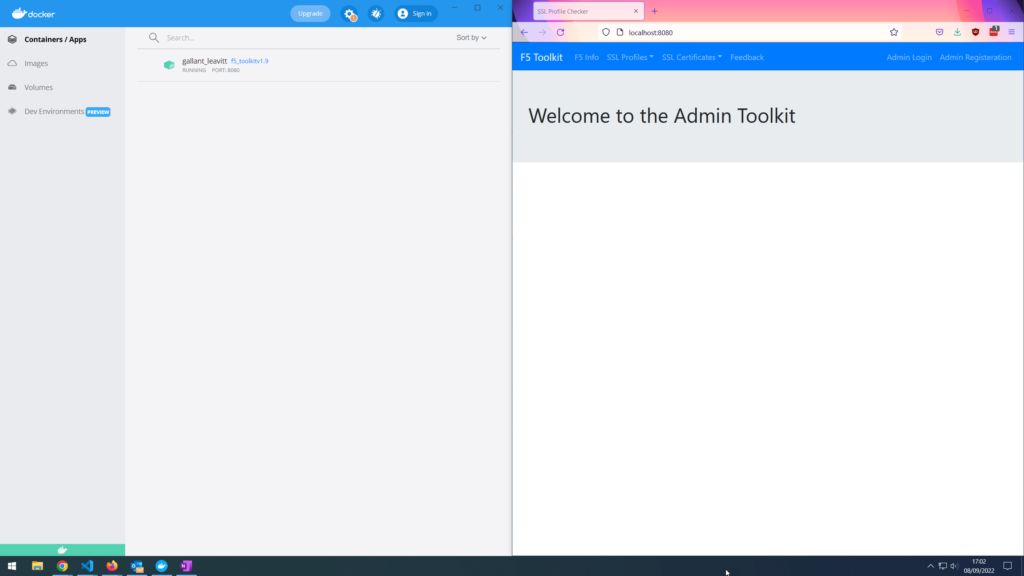
Now we can check to see it is actually running, then test. That’s all the container should accept connections and function just like it did when testing the Flask app in VScode or other IDE.
|
0 1 2 3 4 |
> docker ps CONTAINER ID IMAGE COMMAND CREATED STATUS PORTS NAMES 55066ae74cc8 docker.repository.test.com/f5_toolkitv1.9 "python ./workdir/ap…" 53 seconds ago Up 51 seconds 0.0.0.0:8080->5000/tcp reverent_wing |
Now if we ever need to stop the container we can use the command below. Be sure to use the container ID and not the name of the image.
|
0 1 2 |
docker stop 55066ae74cc8 |