DevOps principles are becoming very popular in the networking space. In this post, I will demonstrate how to setup a GitLab pipeline using your own GitLab Runner. By default, GitLab does have public runners that perform the same tasks.
Overview
In GitLab, a pipeline is a series of stages and jobs defined in a .gitlab-ci.yml file that outline the tasks to be executed in a CI/CD process. When you push changes to your repository or trigger a pipeline manually, GitLab reads the .gitlab-ci.yml file and executes the defined stages and jobs within a pipeline.
Runners
Runners are agents that execute jobs in a pipeline. GitLab provides shared runners that you can use, or you can set up your own dedicated runners. Runners can be configured with specific tags, allowing you to assign jobs to specific runners based on their capabilities or characteristics.
Shared Runners
- Provided by GitLab
- Used by multiple projects within a GitLab instance
- Convenient way to execute CI/CD pipelines without the need to set up and manage your own dedicated runners
- Can be configured to run jobs on specific platforms or with specific tags
Group Runners
- Specific to a group in GitLab
- Can be shared across multiple projects within that group
- Useful when you have a set of projects that require similar configurations or share common resources.
Specific Runners
- Dedicated to individual projects
- Registered and configured to work exclusively for a single project
- Suitable when you have specific requirements or dependencies that are unique to a project
Documents
Installation
The GitLab runner needs to be installed somewhere, there are multiple OS options. In this example, I have used Linux.
|
0 1 2 3 |
curl -LJO "https://gitlab-runner-downloads.s3.amazonaws.com/latest/deb/gitlab-runner_amd64.deb" https://docs.gitlab.com/runner/install/ |
|
0 1 2 |
dpkg -i gitlab-runner_amd64.deb |
The GitLab runner should be installed as a service this way, check that it is runningsudo gitlab-runner status
Register Runner
Currently, the runner has been installed on my Ubuntu VM. This needs to be connected to GitLab. To do this, navigate to the project in GitLab that you want to use this runner for. I have chosen to use my Terraform project as an example.
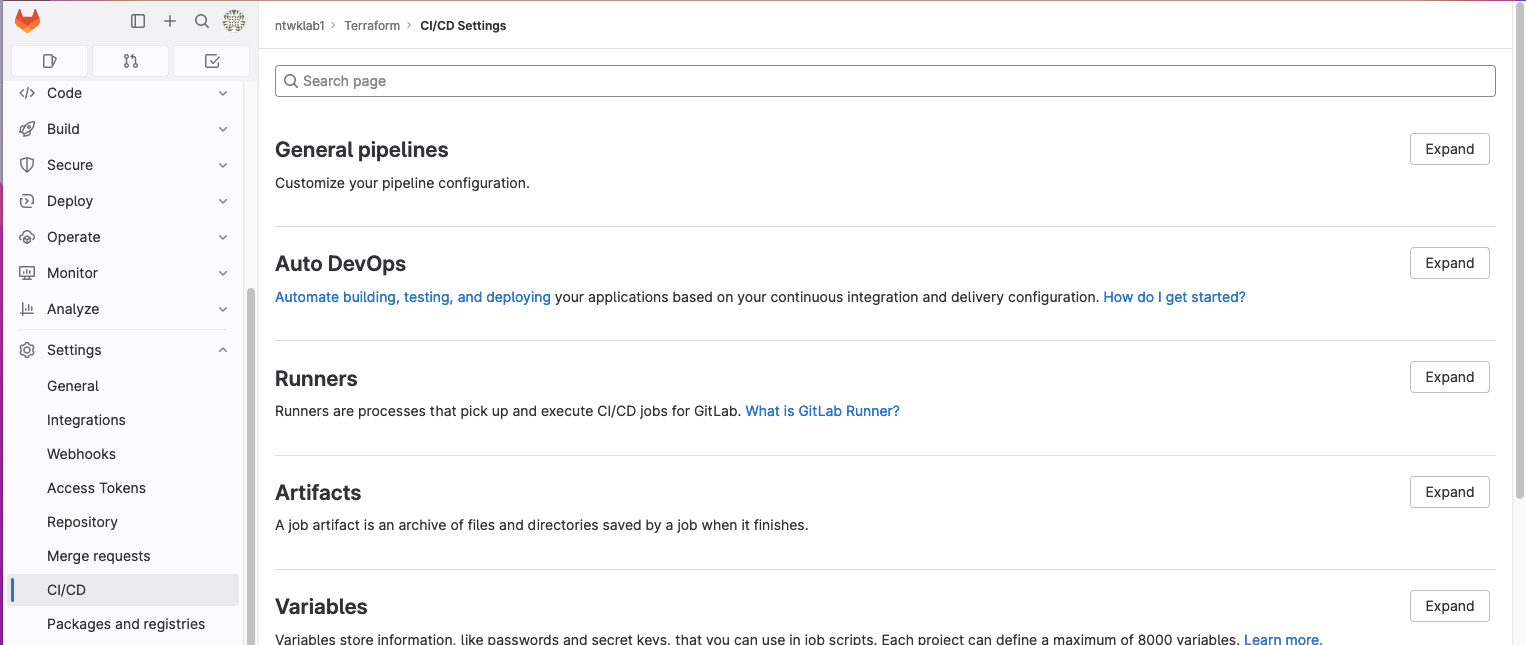
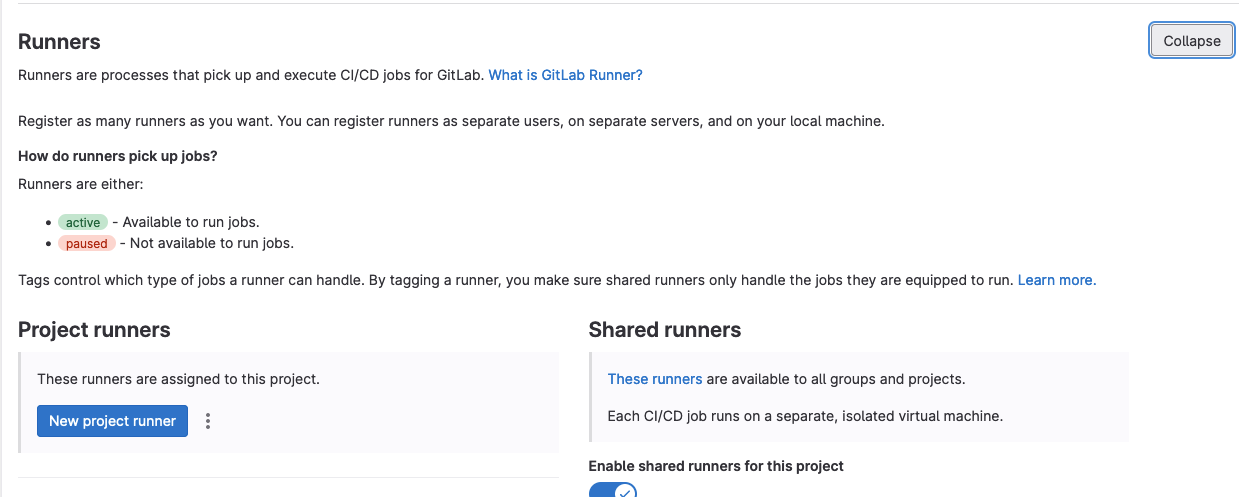
Under Project Overview navigate to settings >> CI\CD >> Runners >> Expand
Create a new Project Runner
Options to select for me will be;
- Platform: Linux
- Tags: run untagged jobs
- Create Runner
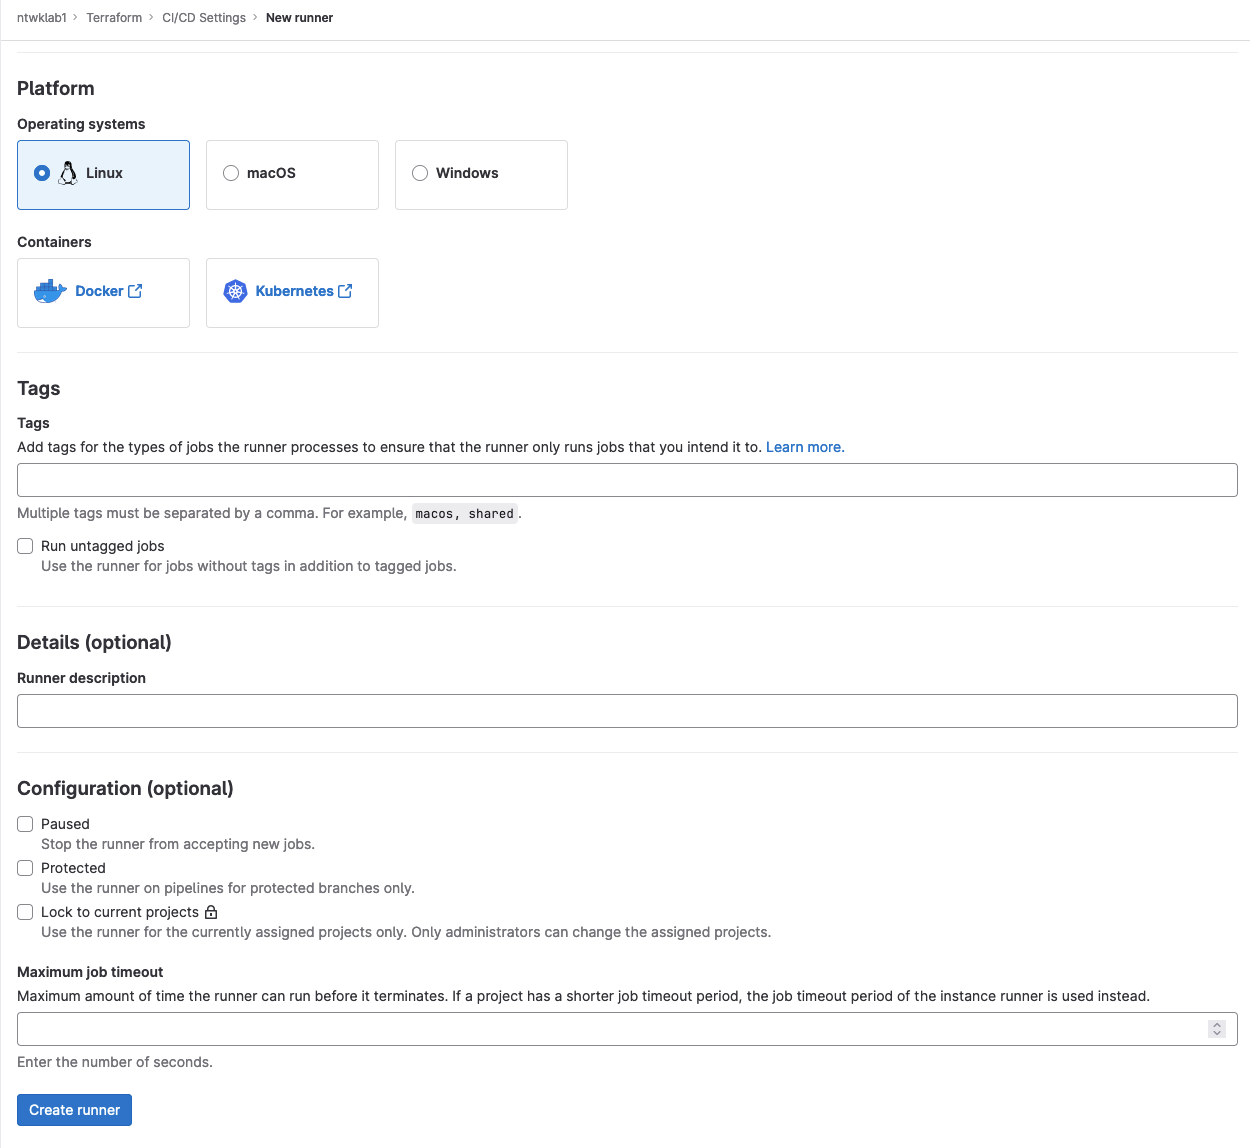
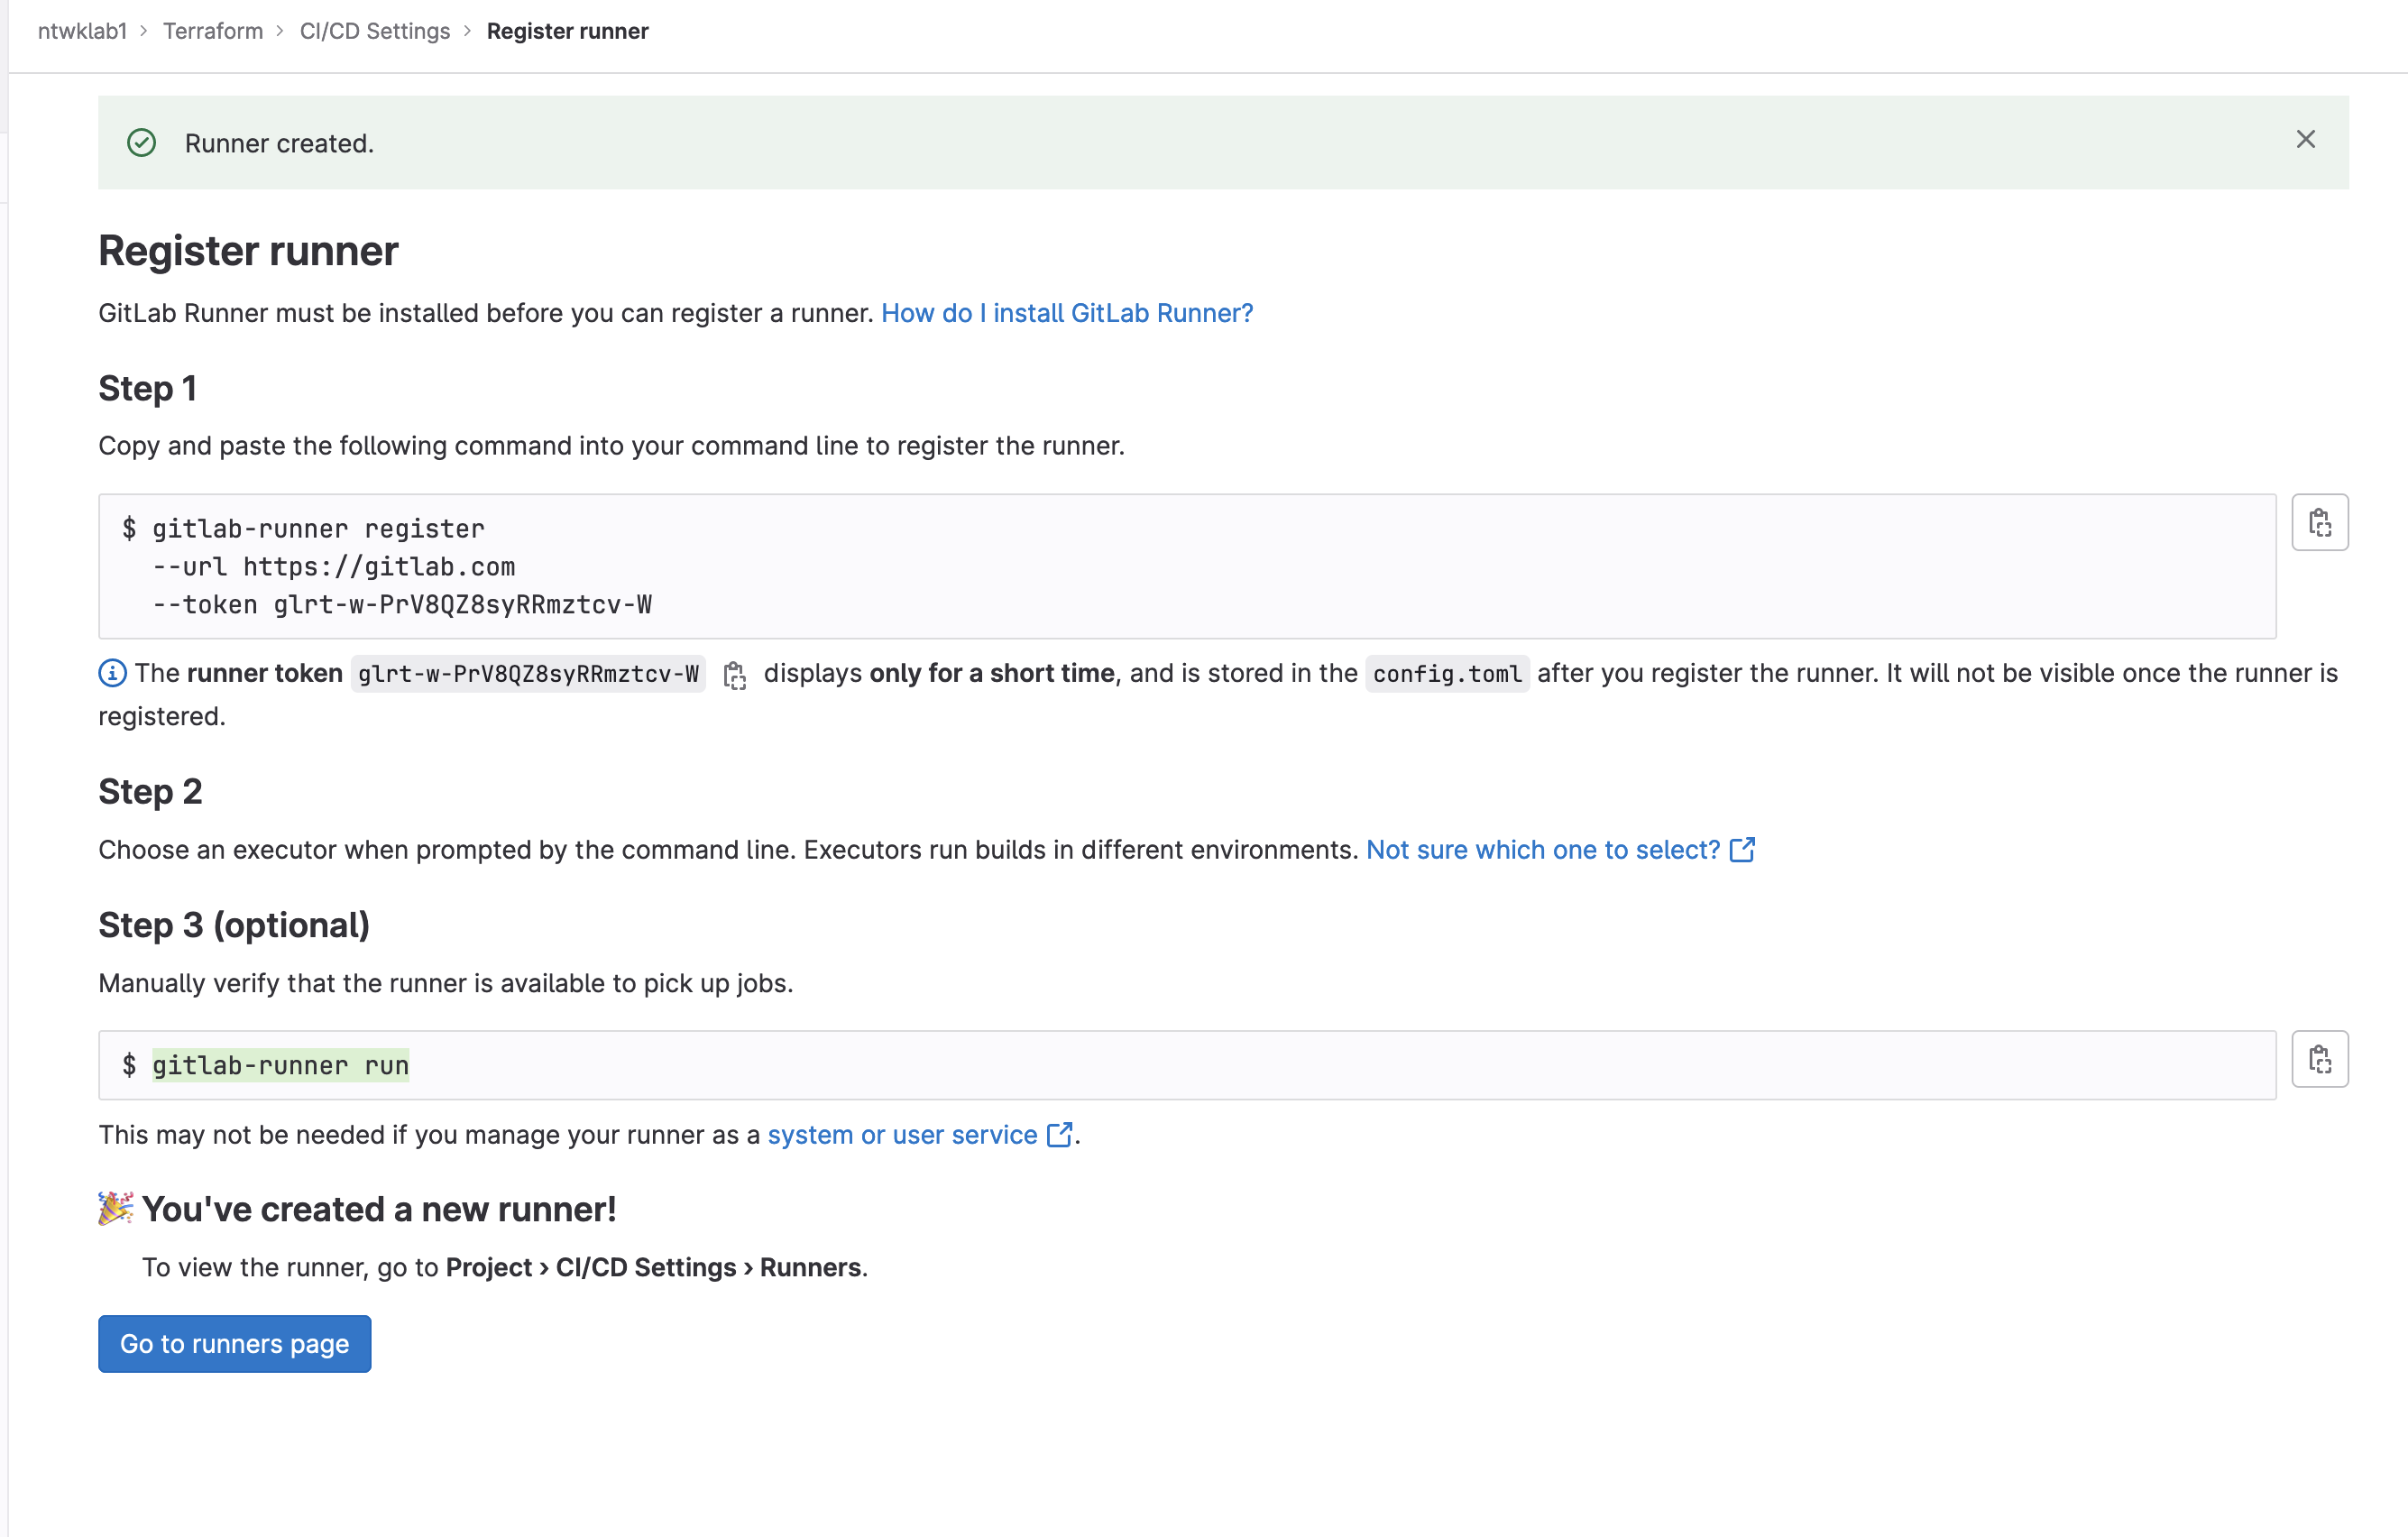
Once Create runner has been clicked, the next screen shows the details to connect the runner.
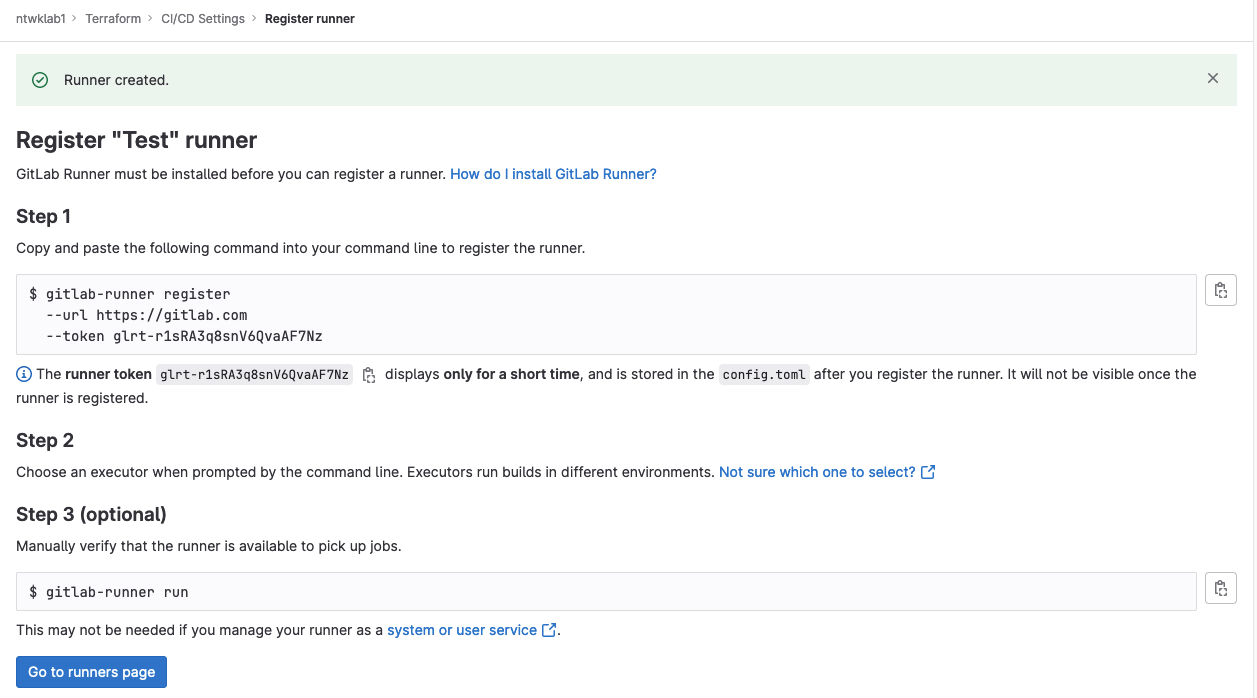
A few notes about registering the runner, there are multiple parameters to configure on the GitLab runner itself. The main one is the executor.
The GitLab Runner executor is responsible for executing the jobs defined in the .gitlab-ci.yml file within a CI/CD pipeline. The executor determines how the jobs are executed and provides the necessary environment for running the commands and scripts specified in the pipeline configuration.
There are multiple different options. I will only go over Docker in this example. The Docker executor runs each job within a separate Docker container. It provides better isolation between jobs and allows you to use specific Docker images for each job. The Docker executor is useful when you need reproducible and isolated environments for running your jobs.
The docker container by default is Ruby. You can choose what you want this to be. I have picked alpine docker image. This image does not have Terraform installed by default, but that is OK, as this can be changed in the .gitlab-ci.yml file.
Back on Linux, we will register the runner using the details provided from GitLab
URL: https://gitlab.com
Token: lrt-r1sRA3q8snV6QvaAF7Nz
When I registered this runner with the above commands, it could not connect to any local resources. There is an option to add to the config.toml file after the runner has been registered, but again I had difficulty having these changes take effect./etc/gitlab-runner/config.toml[runners.docker]network_mode = "gitlab-runner-net"
To get around this, I removed and re-registered the runner, adding in the docker network. To create the docker network, I used docker network create -d bridge gitlab-runner-net. This creates a new bridge network that can be viewed with sudo docker network ls.
Always run as sudo otherwise it will save and run as the user it was registered under. This caused me a lot of confusion, so sudo seems best to me.
|
0 1 2 3 4 |
sudo gitlab-runner register --docker-network-mode 'gitlab-runner-net' \ --url https://gitlab.com \ --token <TOKEN> \ |
|
0 1 2 3 4 5 6 7 8 9 10 11 12 13 14 15 16 17 18 19 20 21 22 23 24 |
stef@stef-VirtualBox:~$ gitlab-runner register Runtime platform arch=amd64 os=linux pid=941392 revision=b72e108d version=16.1.0 WARNING: Running in user-mode. WARNING: The user-mode requires you to manually start builds processing: WARNING: $ gitlab-runner run WARNING: Use sudo for system-mode: WARNING: $ sudo gitlab-runner... Created missing unique system ID system_id=s_d026d2ddc67d Enter the GitLab instance URL (for example, https://gitlab.com/): https://gitlab.com Enter the registration token: lrt-r1sRA3q8snV6QvaAF7Nz Verifying runner... is valid runner=w-PrV8QZ8 Enter a name for the runner. This is stored only in the local config.toml file: [stef-VirtualBox]: Enter an executor: docker, docker-windows, parallels, virtualbox, docker-autoscaler, custom, shell, ssh, docker+machine, instance, kubernetes: docker Enter the default Docker image (for example, ruby:2.7): alpine Runner registered successfully. Feel free to start it, but if it's running already the config should be automatically reloaded! Configuration (with the authentication token) was saved in "/home/stef/.gitlab-runner/config.toml" |
The runner registration command creates a file /etc/gitlab-runner/config.toml. Inside this file are the settings.
|
0 1 2 3 4 5 6 7 8 9 10 11 12 13 14 15 16 17 18 19 20 21 22 23 24 25 26 27 28 29 |
sudo cat /etc/gitlab-runner/config.toml concurrent = 1 check_interval = 0 shutdown_timeout = 0 [session_server] session_timeout = 1800 [[runners]] name = "stef-VirtualBox" url = "https://gitlab.com" id = 24898178 token = "TOKEN" token_obtained_at = 2023-07-03T16:30:23Z token_expires_at = 0001-01-01T00:00:00Z executor = "docker" [runners.cache] MaxUploadedArchiveSize = 0 [runners.docker] tls_verify = false image = "alpine" privileged = false disable_entrypoint_overwrite = false oom_kill_disable = false disable_cache = false volumes = ["/cache"] network_mode = "gitlab-runner-net" shm_size = 0 |
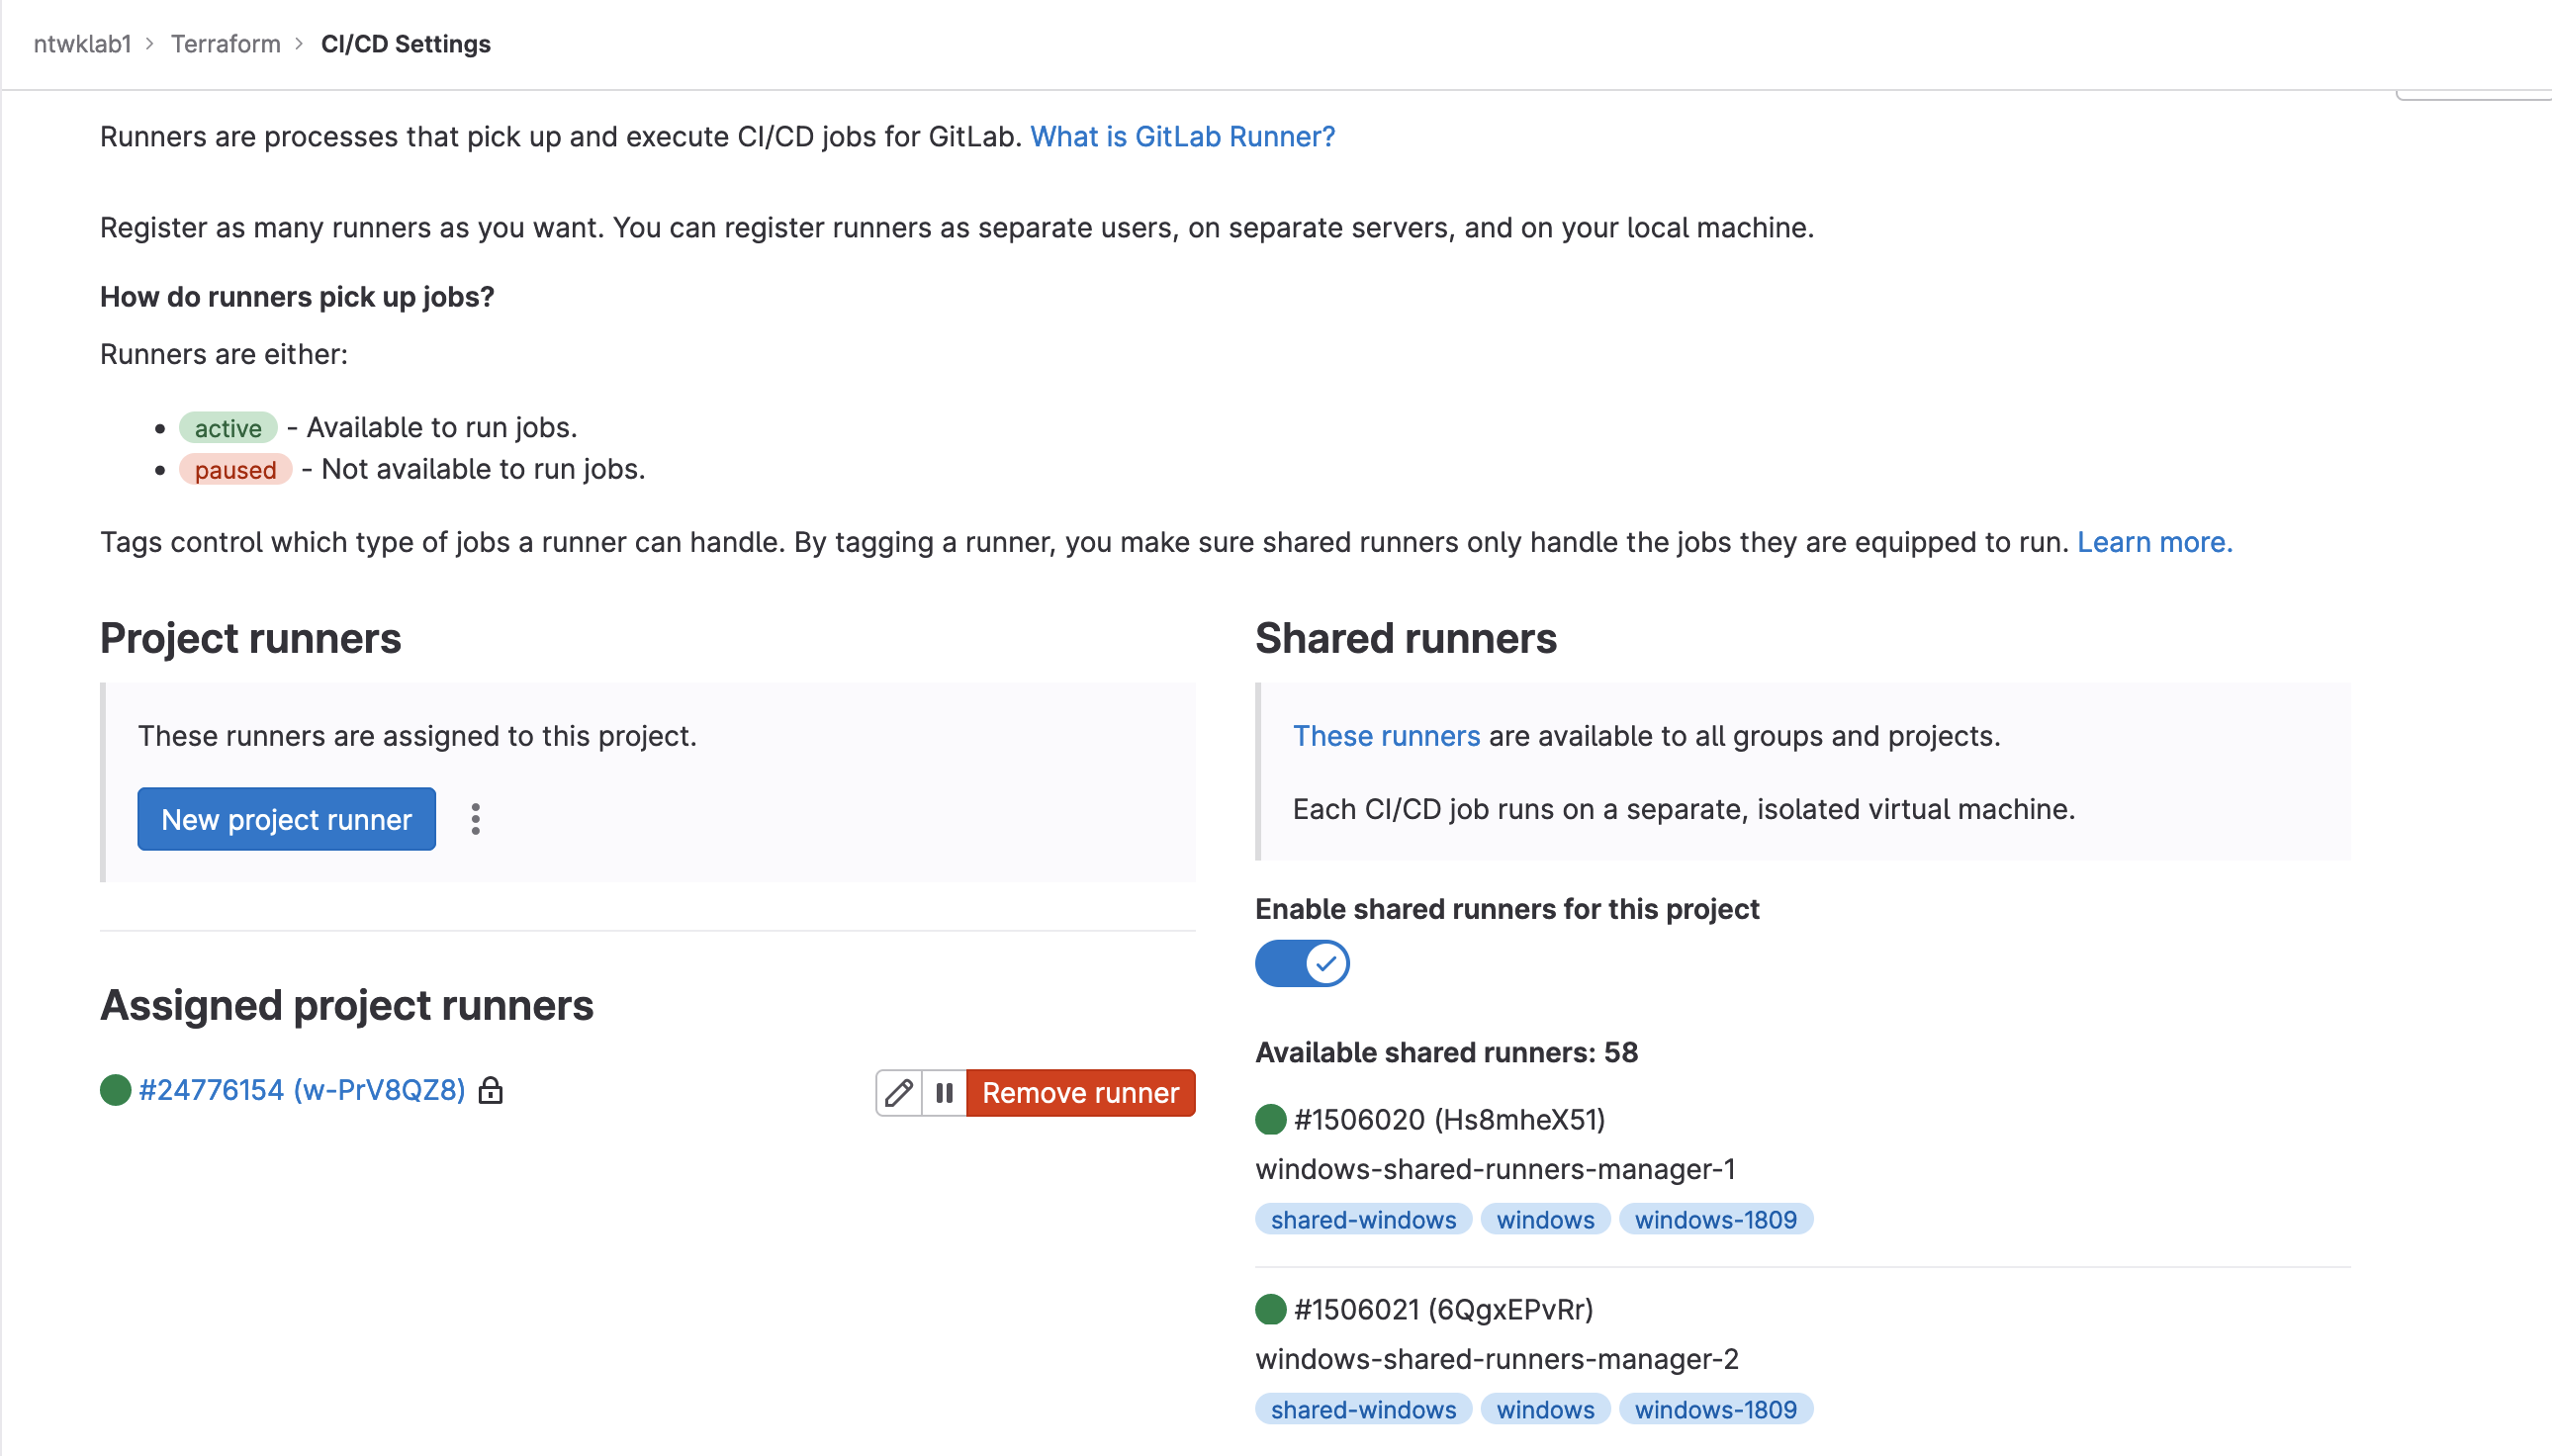
Run the runner, and back on that same GitLab page, a notification will be shown that states the runner has been connected. The runner will also be shown as green in the settings page.
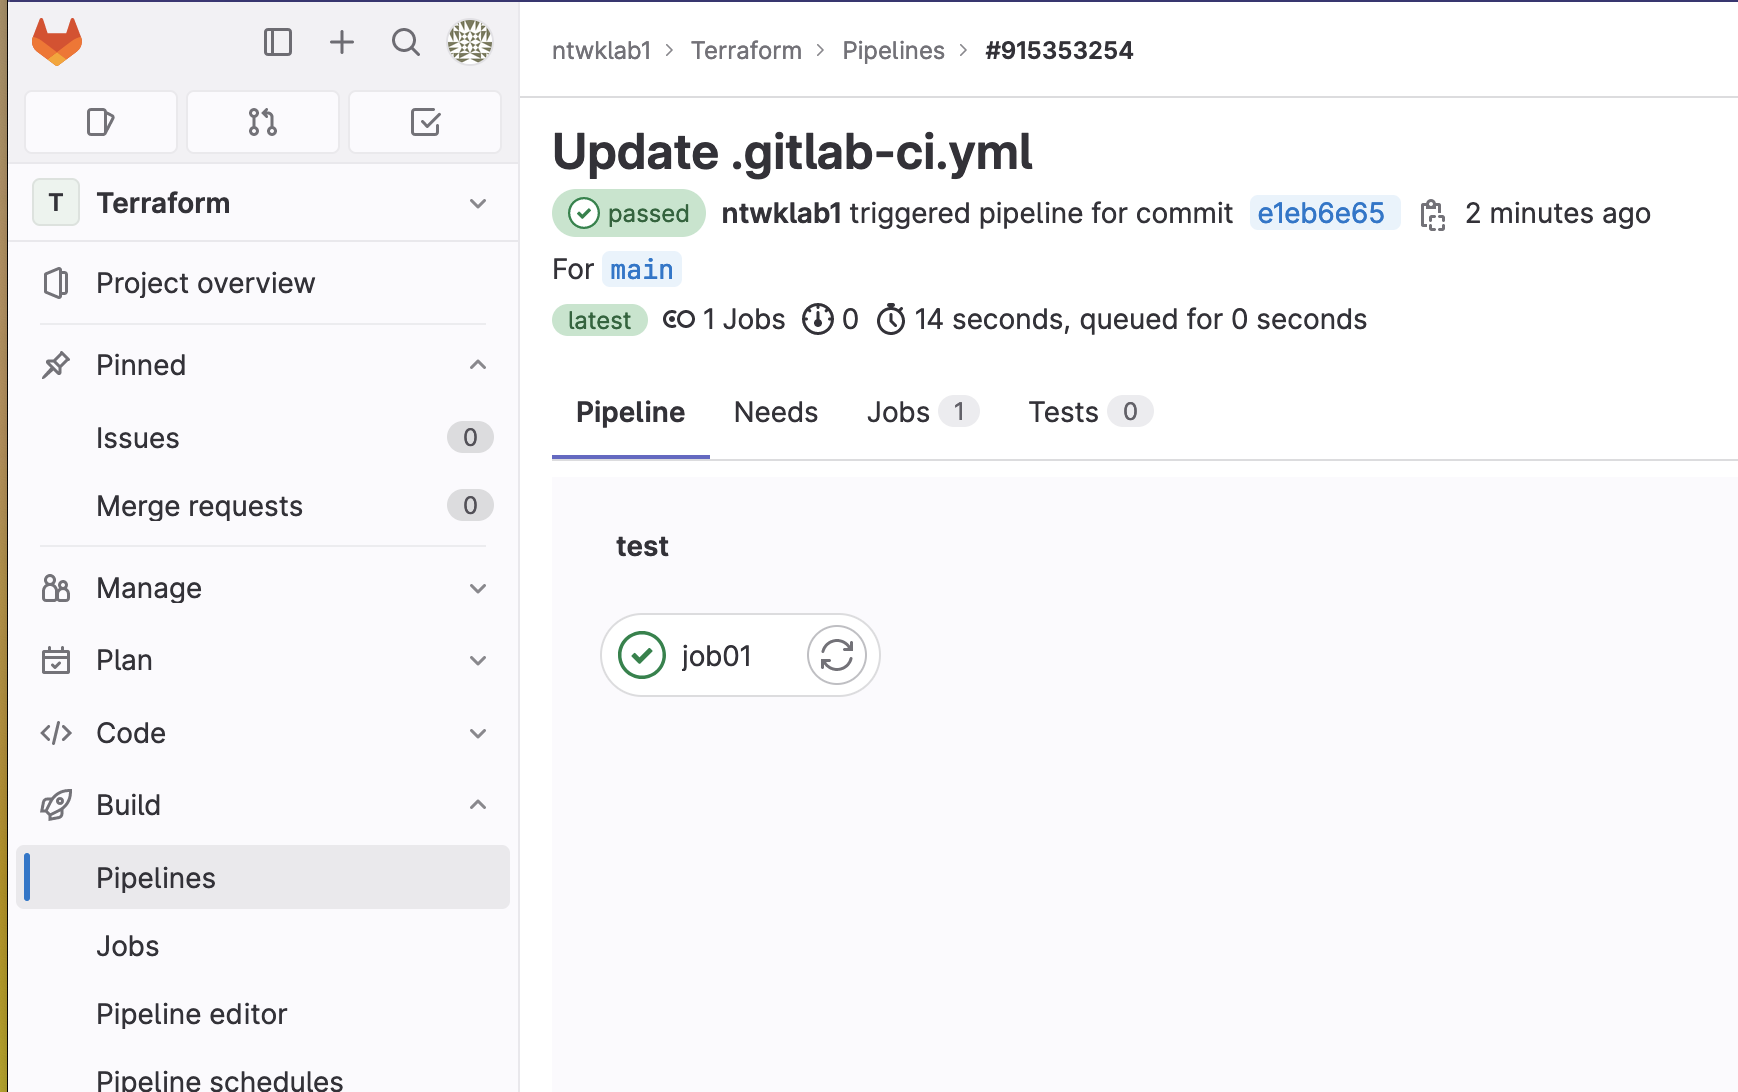
Create a Test Job
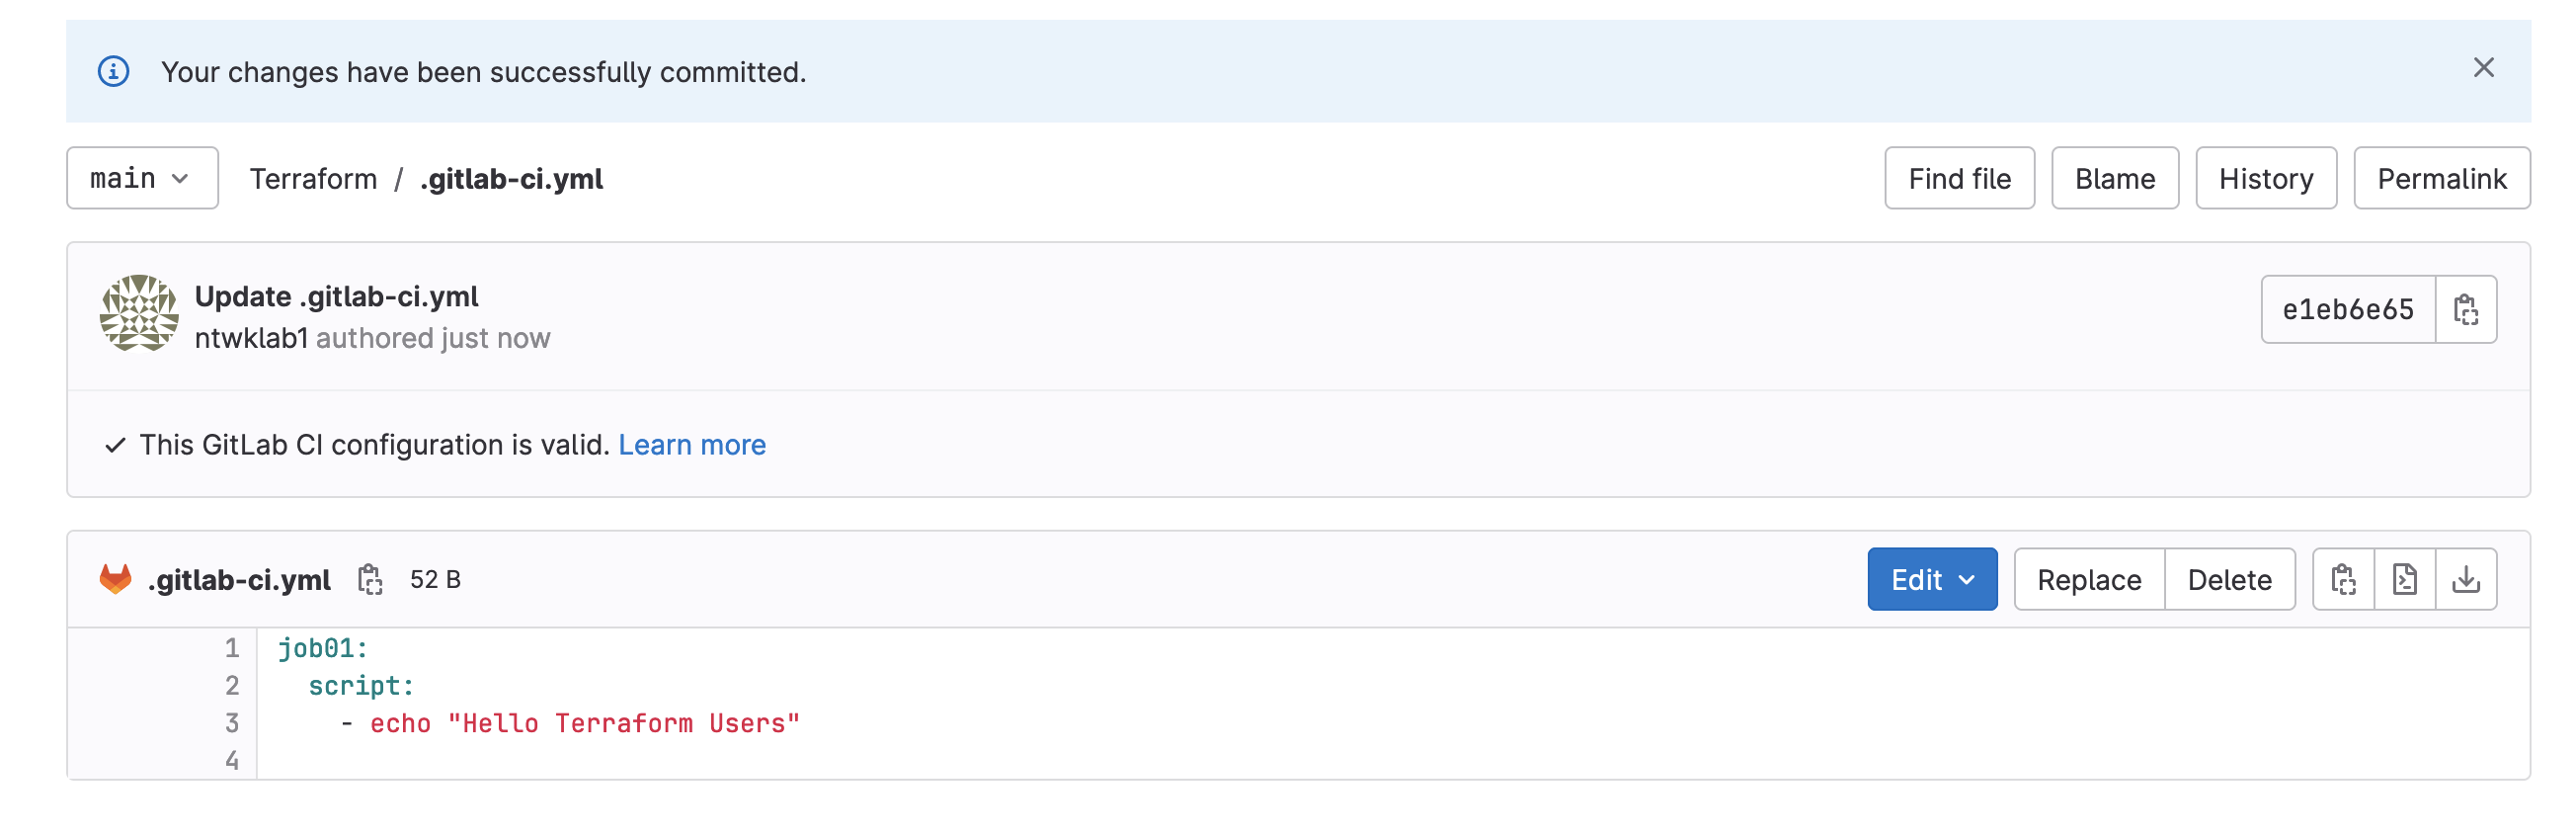
Now that the runner has been connected, a test job can be created. Navigate back to the repository and a file named .gitlab-ci.yml needs to be created. This file is what controls the runner. Whenever there is a change to this file, it will be executed on the GitLab runner.
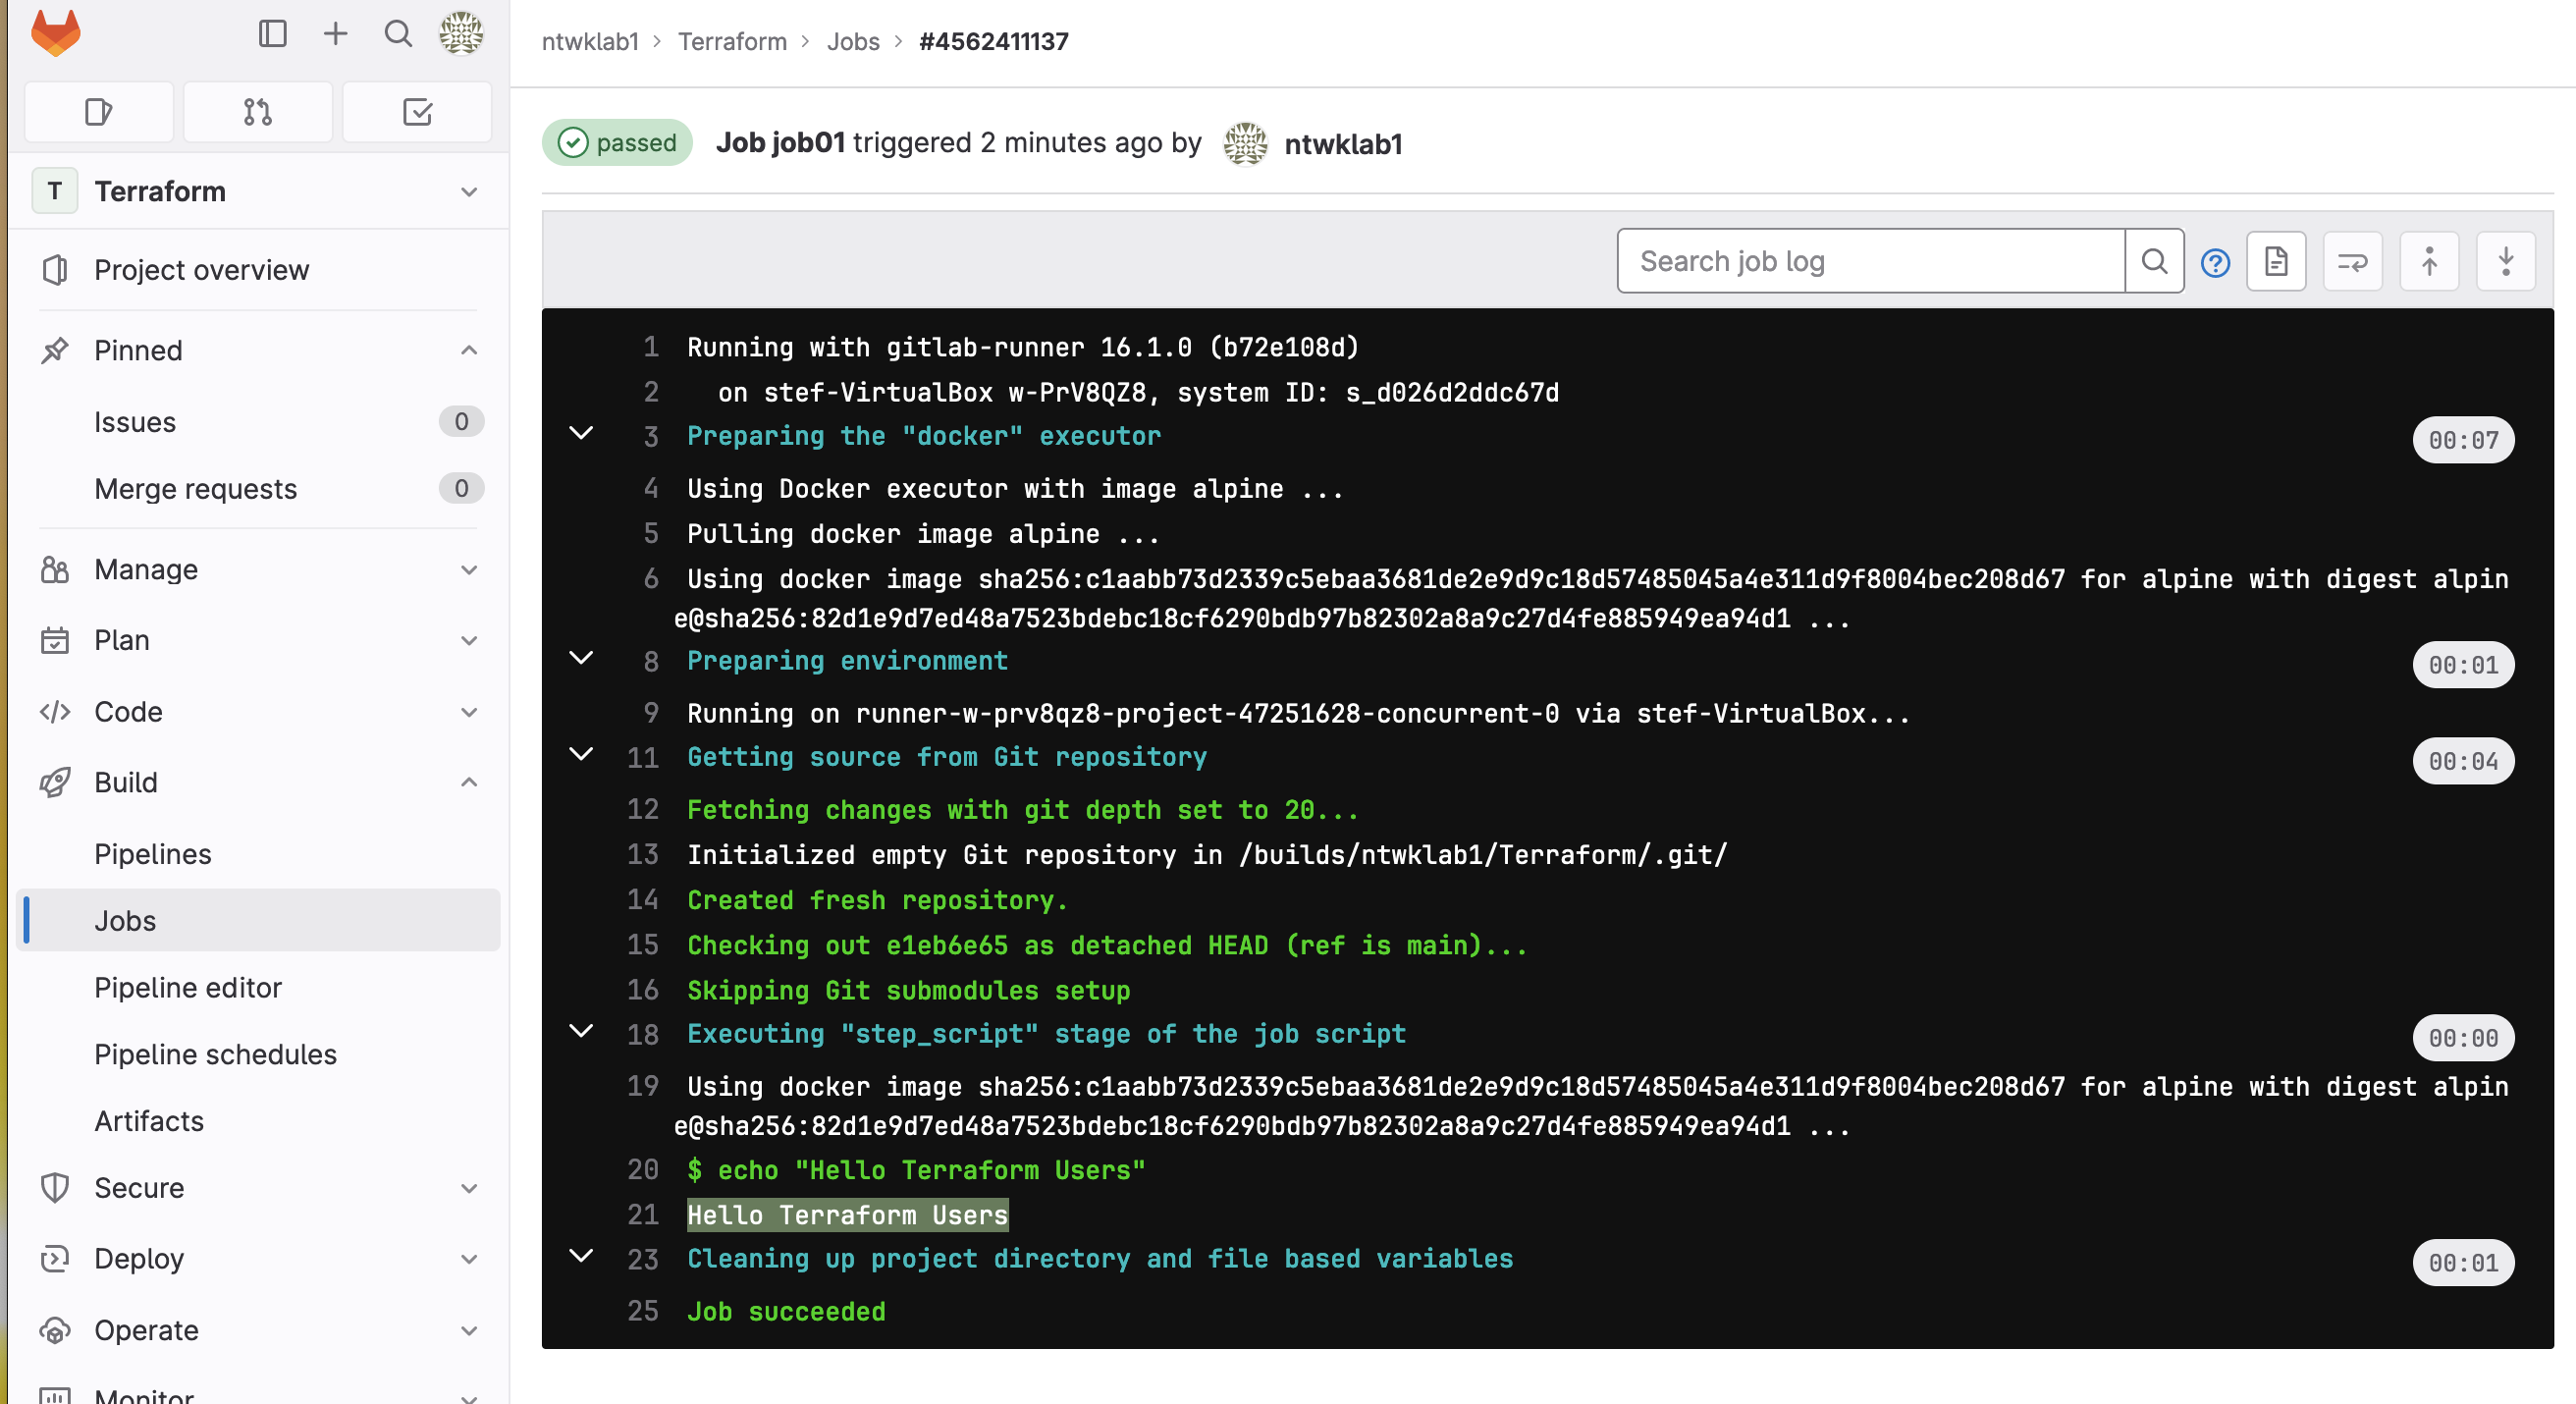
As a basic test, I have created the following job to display “Hello Terraform User”
The output on the runner is
|
0 1 2 3 4 5 6 7 8 9 10 11 12 13 |
Configuration loaded builds=0 listen_address not defined, metrics & debug endpoints disabled builds=0 [session_server].listen_address not defined, session endpoints disabled builds=0 Initializing executor providers builds=0 Checking for jobs... received job=4562411137 repo_url=https://gitlab.com/ntwklab1/Terraform.git runner=w-PrV8QZ8 Appending trace to coordinator...ok code=202 job=4562411137 job-log=0-273 job-status=running runner=w-PrV8QZ8 sent-log=0-272 status=202 Accepted update-interval=1m0s Job succeeded duration_s=12.197378389 job=4562411137 project=47251628 runner=w-PrV8QZ8 Appending trace to coordinator...ok code=202 job=4562411137 job-log=0-1809 job-status=running runner=w-PrV8QZ8 sent-log=273-1808 status=202 Accepted update-interval=1m0s Updating job... bytesize=1809 checksum=crc32:81dc8a8b job=4562411137 runner=w-PrV8QZ8 Submitting job to coordinator...accepted, but not yet completed bytesize=1809 checksum=crc32:81dc8a8b code=202 job=4562411137 job-status= runner=w-PrV8QZ8 update-interval=1s Updating job... bytesize=1809 checksum=crc32:81dc8a8b job=4562411137 runner=w-PrV8QZ8 Submitting job to coordinator...ok bytesize=1809 checksum=crc32:81dc8a8b code=200 job=4562411137 job-status= runner=w-PrV8QZ8 update-interval=0s |
The job has been run and can be seen in the GitLab interface.
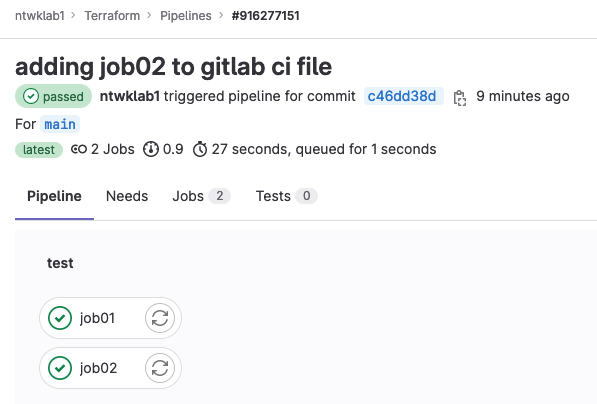
Create a Second Test Job
I’m going to make this change from my machine, and commit to ensure that the job runs as expected.
For this, I need to create a GitLab SSH Key, found in this post. Once that has been setup and tested, I can download the repo and make some changes.
In the following steps, I am going to (For more info on Git commands, see this post)
- Clone the repo
- Create a new branch
- Add a second job to the
.gitlab-ci.yml - Push the new branch to the repo
- Merge the new branch with the main repo
- Push the merged main branch upto GitLab
|
0 1 2 |
git clone git@gitlab.com:ntwklab1/Terraform.git |
|
0 1 2 |
git checkout -b newjob |
|
0 1 2 3 4 5 |
# Add to file: .gitlab-ci.yml job02: script: - echo "Hello Terraform Users, from VS Code" |
|
0 1 2 |
git commit -am "adding job02 to gitlab ci file" |
|
0 1 2 |
git push -u origin newjob |
|
0 1 2 |
git checkout main |
|
0 1 2 |
git merge newjob |
|
0 1 2 |
git push |
Back in the GitLab interface, navigate to: Build >> Pipelines to see the status of the jobs. Clicking on job02 will show the details, and in there is the echo Hello Terraform Users, from VS Code

Merging in GitLab – Creating a Third Job
In the previous example, the merge request was performed in the Git CLI. When committing a branch, the merge request can be raised through GitLab.
If I make a change to the .gitlab-ci.yml file, I can demonstrate this.
|
0 1 2 |
git checkout -b changetoci |
|
0 1 2 |
git commit -am "changing job02 echo output" |
|
0 1 2 3 4 5 6 7 8 9 10 11 12 13 14 15 |
git push -u origin changetoci Enumerating objects: 5, done. Counting objects: 100% (5/5), done. Delta compression using up to 8 threads Compressing objects: 100% (3/3), done. Writing objects: 100% (3/3), 320 bytes | 320.00 KiB/s, done. Total 3 (delta 2), reused 0 (delta 0), pack-reused 0 remote: remote: To create a merge request for changetoci, visit: remote: https://gitlab.com/ntwklab1/Terraform/-/merge_requests/new?merge_request%5Bsource_branch%5D=changetoci remote: To gitlab.com:ntwklab1/Terraform.git * [new branch] changetoci -> changetoci branch 'changetoci' set up to track 'origin/changetoci'. |
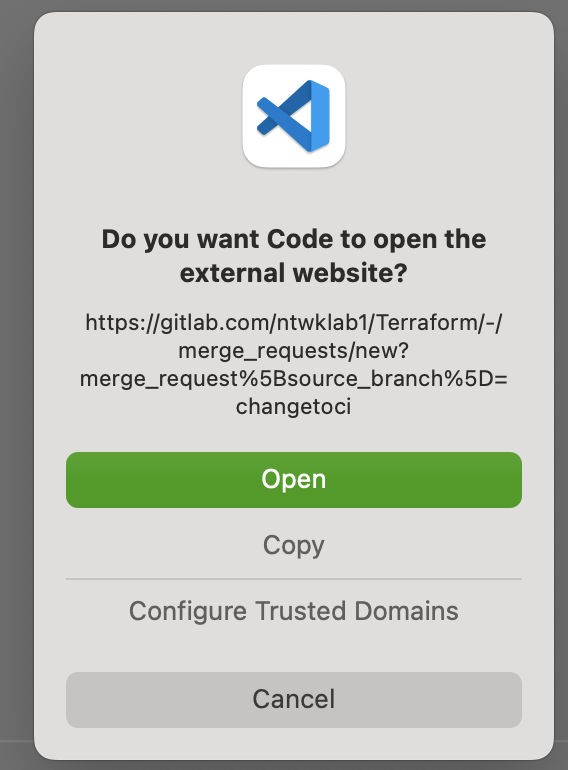
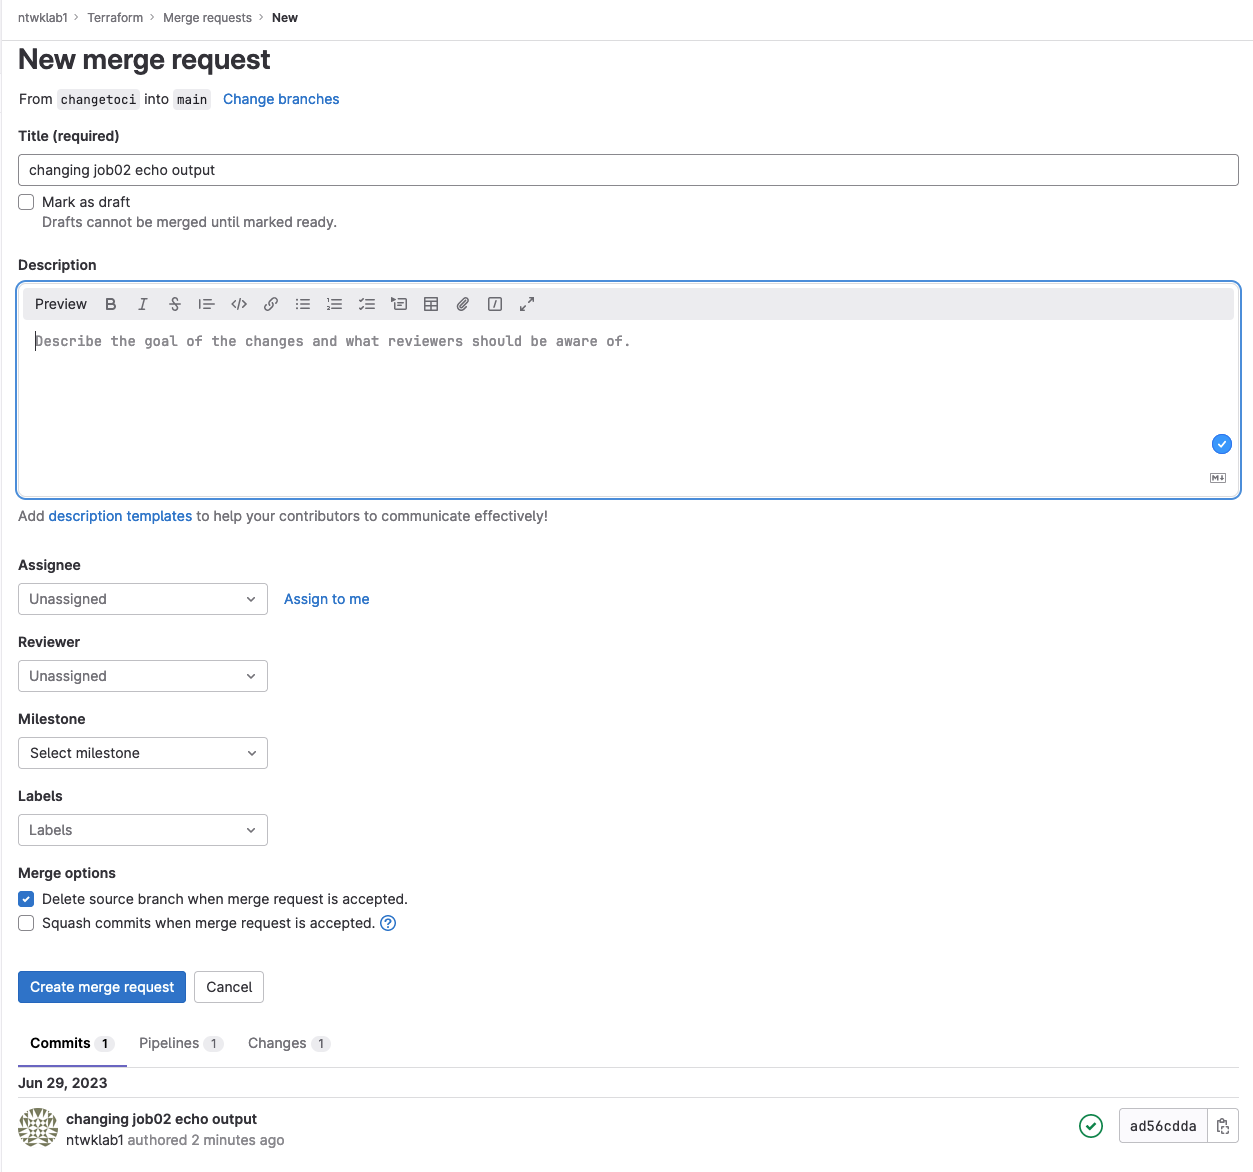
In the above ouput for the pushing of the branch to GitLab, there is a link https://gitlab.com/ntwklab1/Terraform/-/merge_requests/new?merge_request%5Bsource_branch%5D=changetoci
This is the link that if clicked will take you to create a merge request in GitLab
In the GitLab interface, more details can be added. There is more that can be done here, such as having a merge request approved before being merged.
Now the merge request has been made it can be approved (optional in this example), and merged.
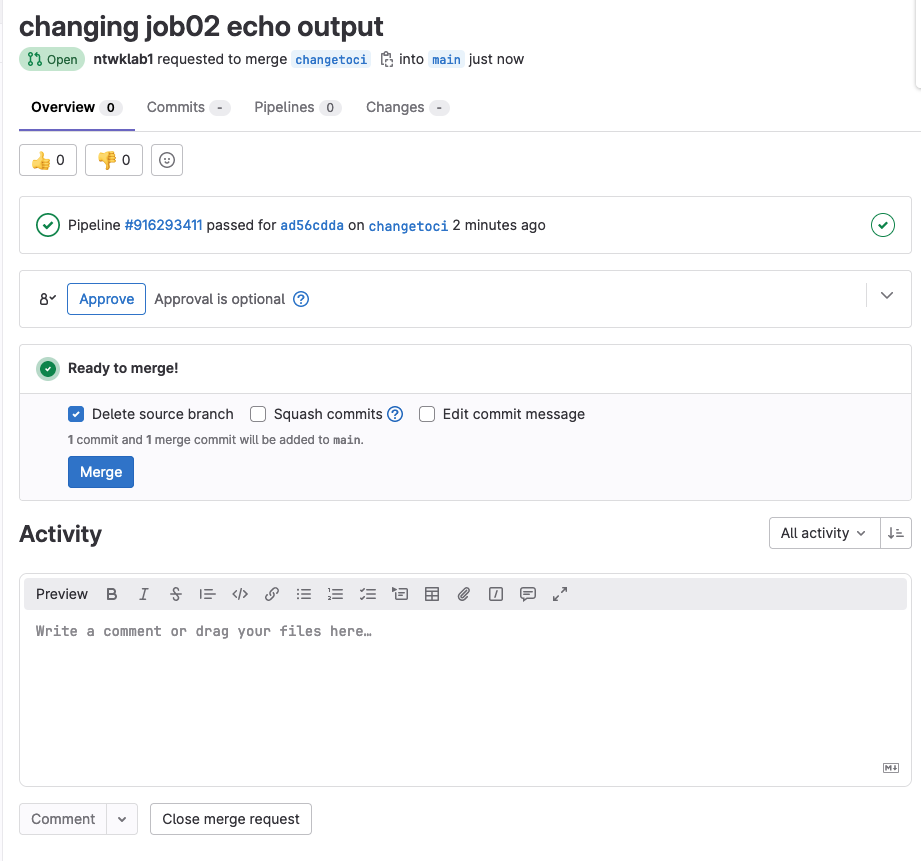
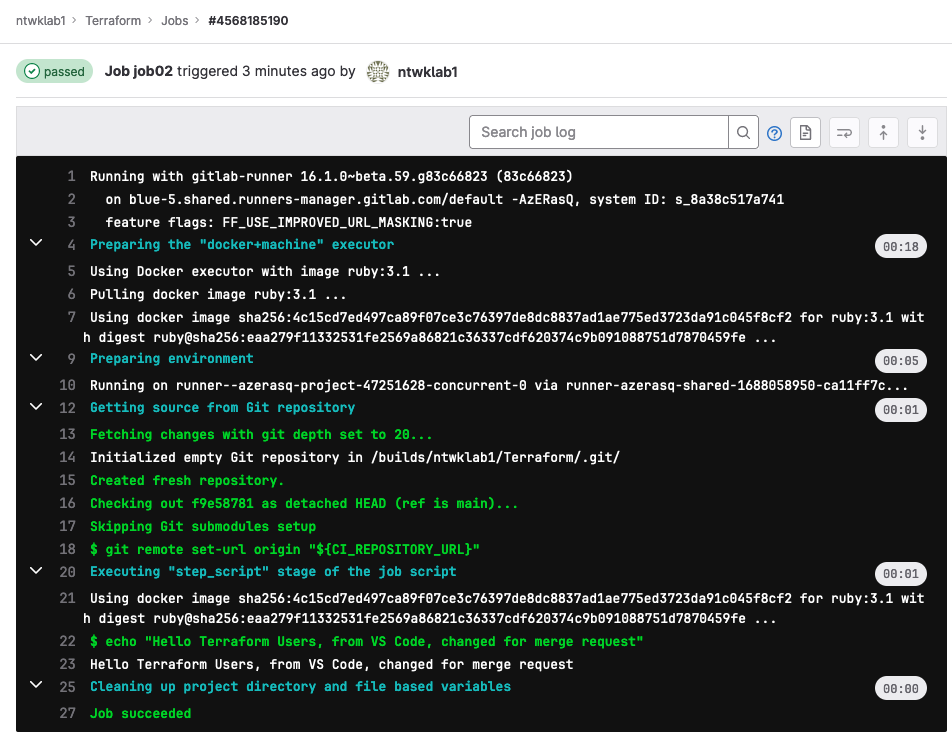
Once merged, the pipeline will then run automatically. This again is something that can be changed.
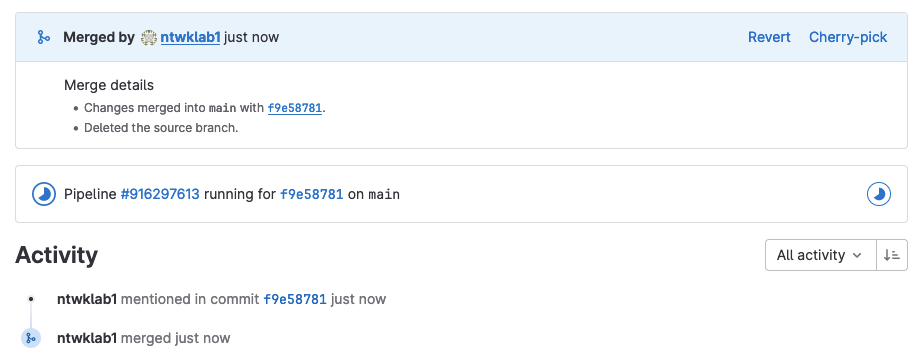
Navigating over to Build >> Jobs and selecting the latest job which will be job02. In the output is the echo command, shown, $ echo "Hello Terraform Users, from VS Code, changed for merge request"