
In a previous post, I have created a sample of FortiGate config with Terraform. This was all performed locally from a Windows machine. While this is good in a lab environment, the major problem with it is that the management doesn’t scale.
If there is more than a single network engineer, they need to share the same Terraform state file. If this is stored locally on a single machine, then it’s difficult to manage, and we do not want it to go out of sync. So this is where a tool such as GitLab and the use of managed Terraform States. I have previously talked about them in my AWS Terraform post.
In this post it is a little different as the GitLab runner needs to communicate with local resources and not internet ones. I have written about this in my ACI Automation post. But I will go over again, as that was performed on a Mac.
Lab
The lab is the same as the lab that has been used in my previous FortiGate Terraform post. A single FortiGate running version 7.2. There are two clients connected, but they serve no purpose in this lab.

Setup
Fortigate Repo in GitLab
Create new Runner in GitLab
Create new Docker Network
Install GitLab Runner (Ubuntu)
Create new Managed Terraform State
Test
Create new Runner in GitLab
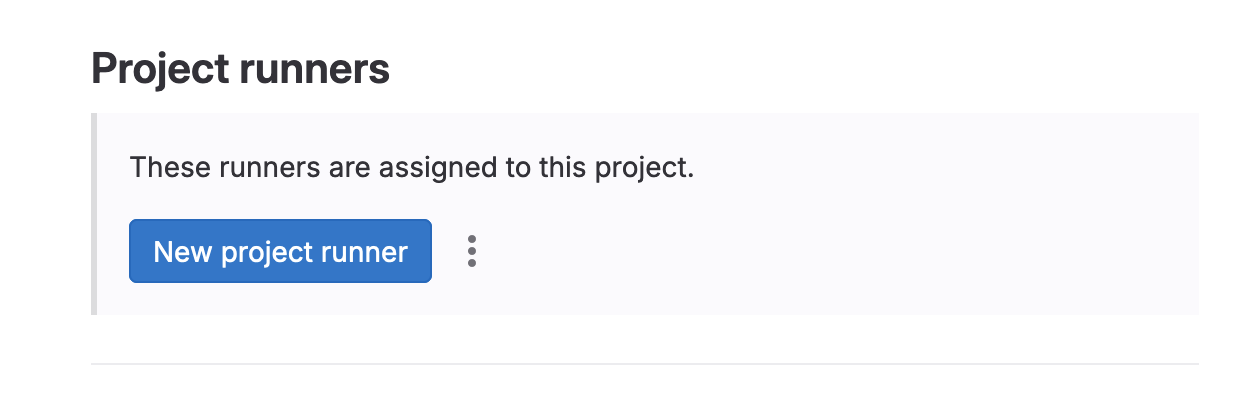
The runner is created in the project under: Settings >> CI/CD >> Runners
From here, create a new runner
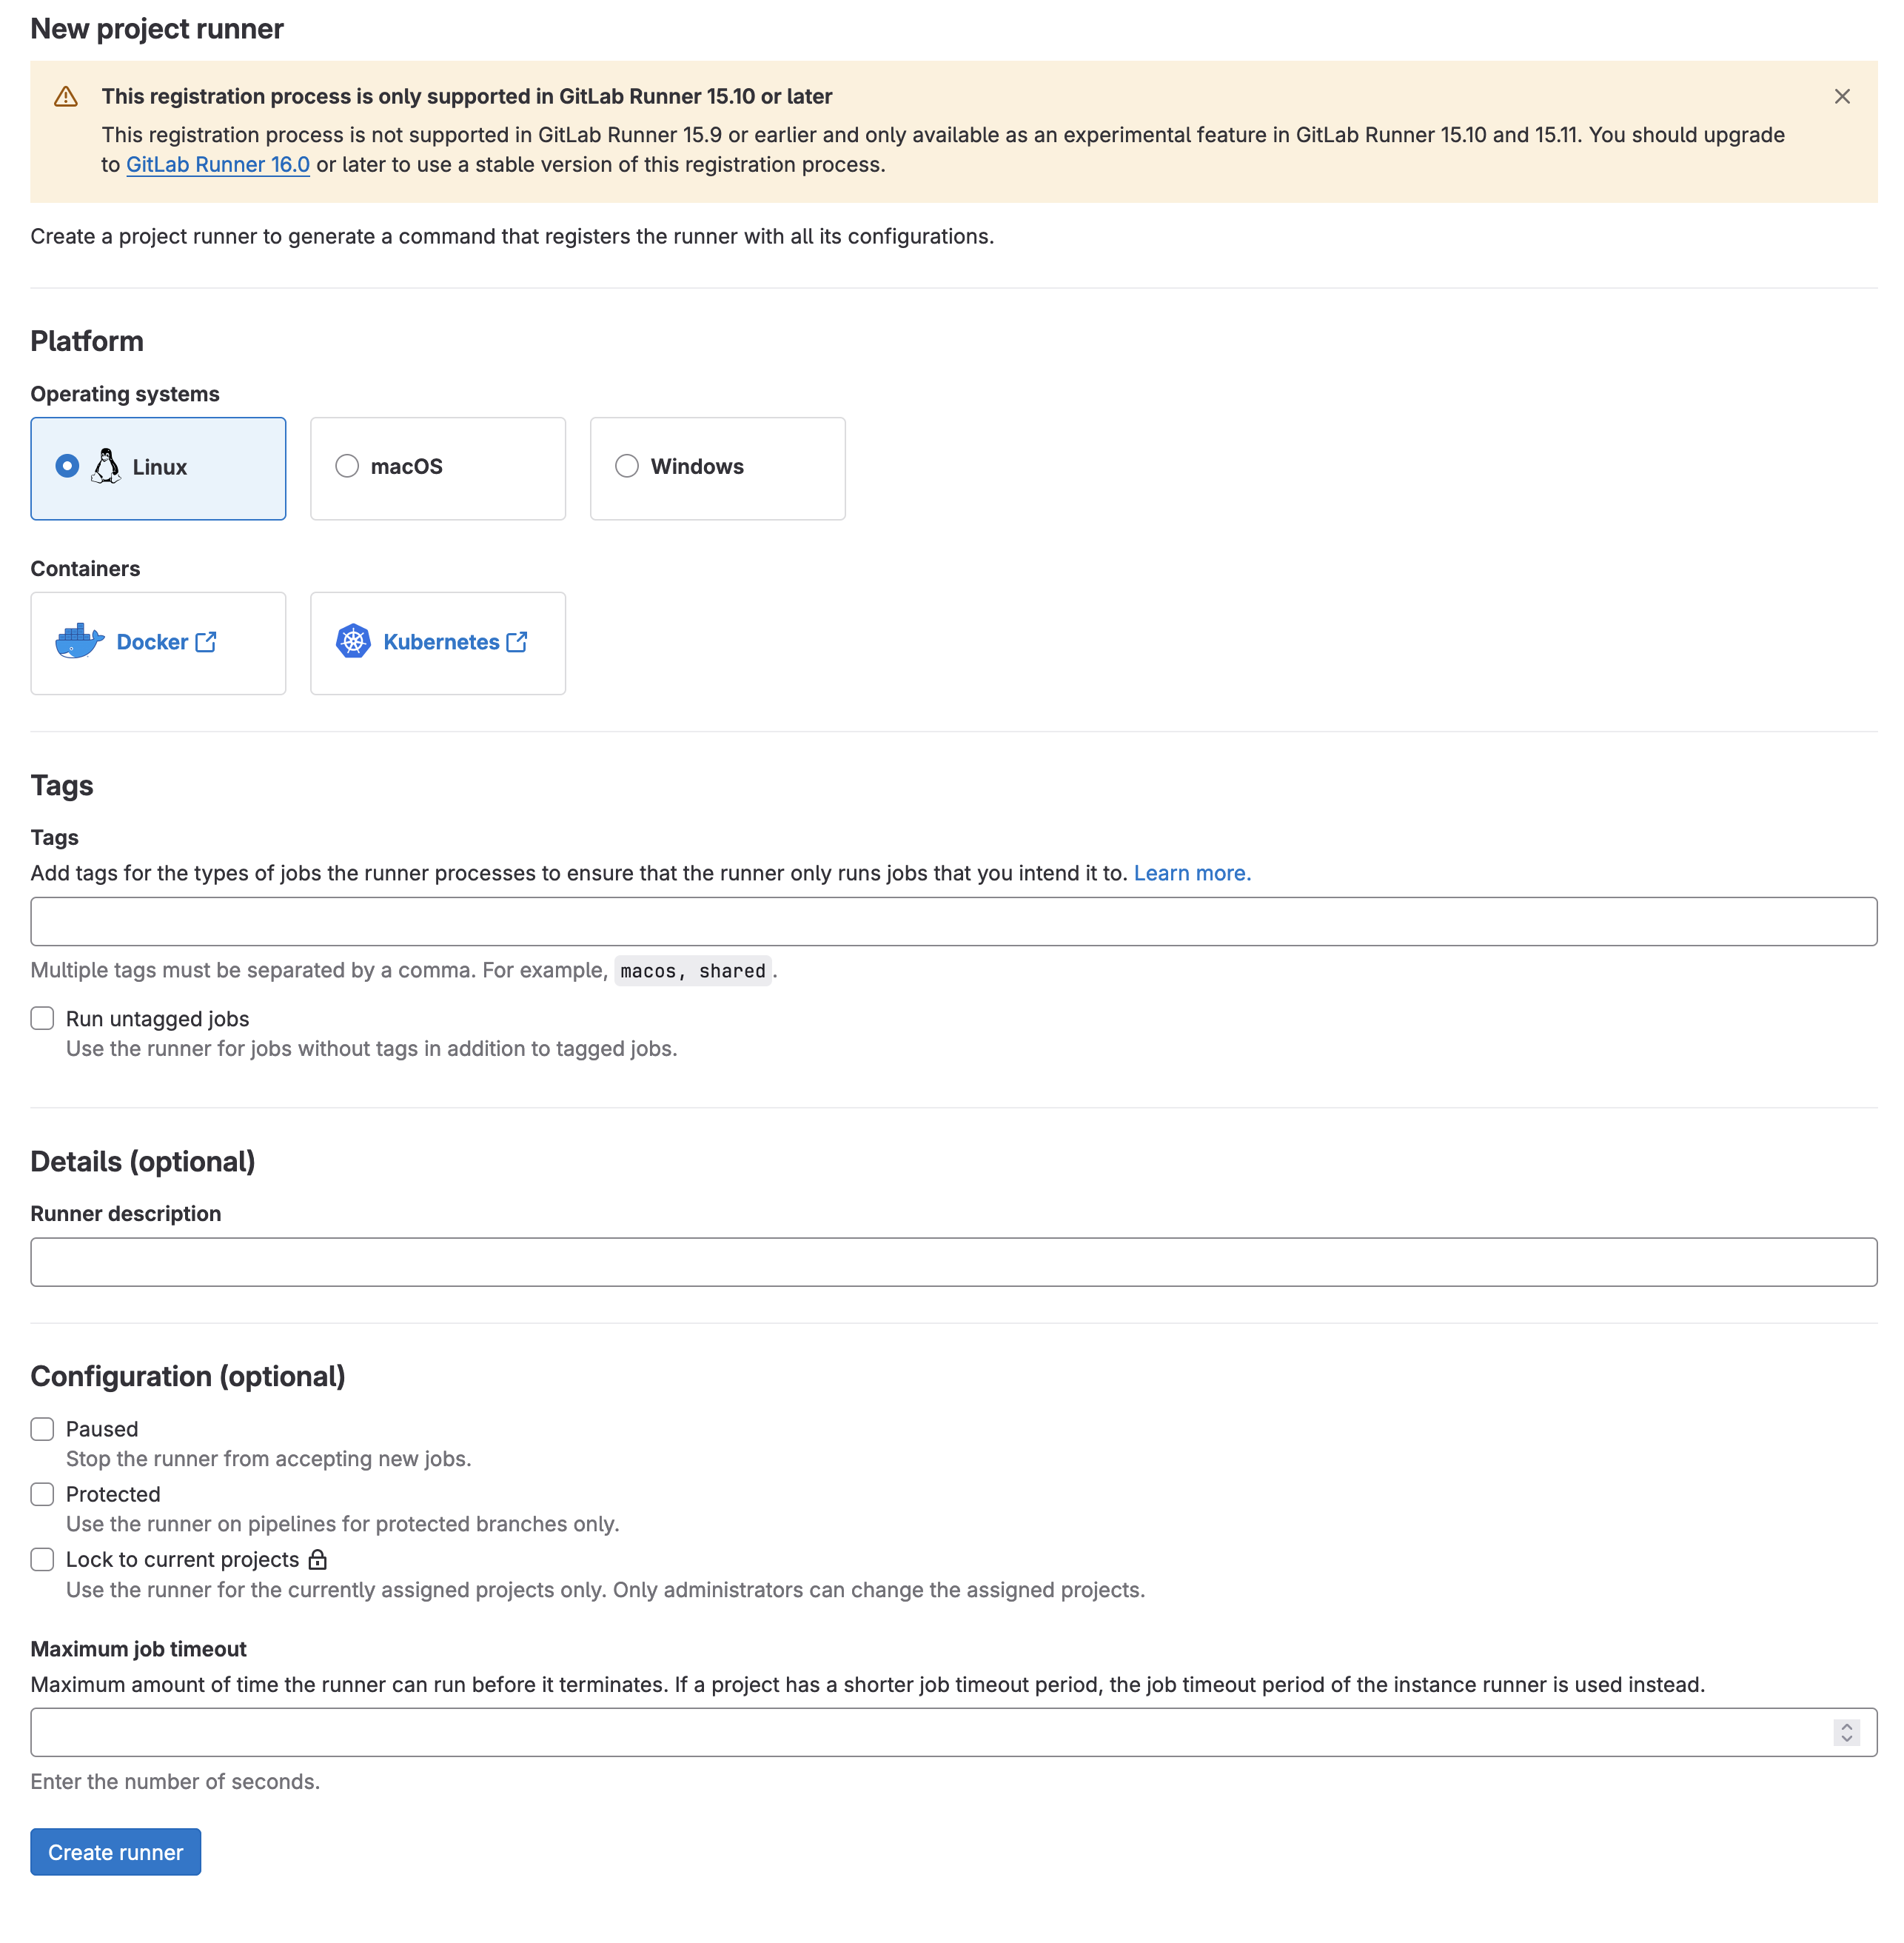
The new runner options will look similar to the screenshot below. I will be using Ubuntu, so Linux for me.
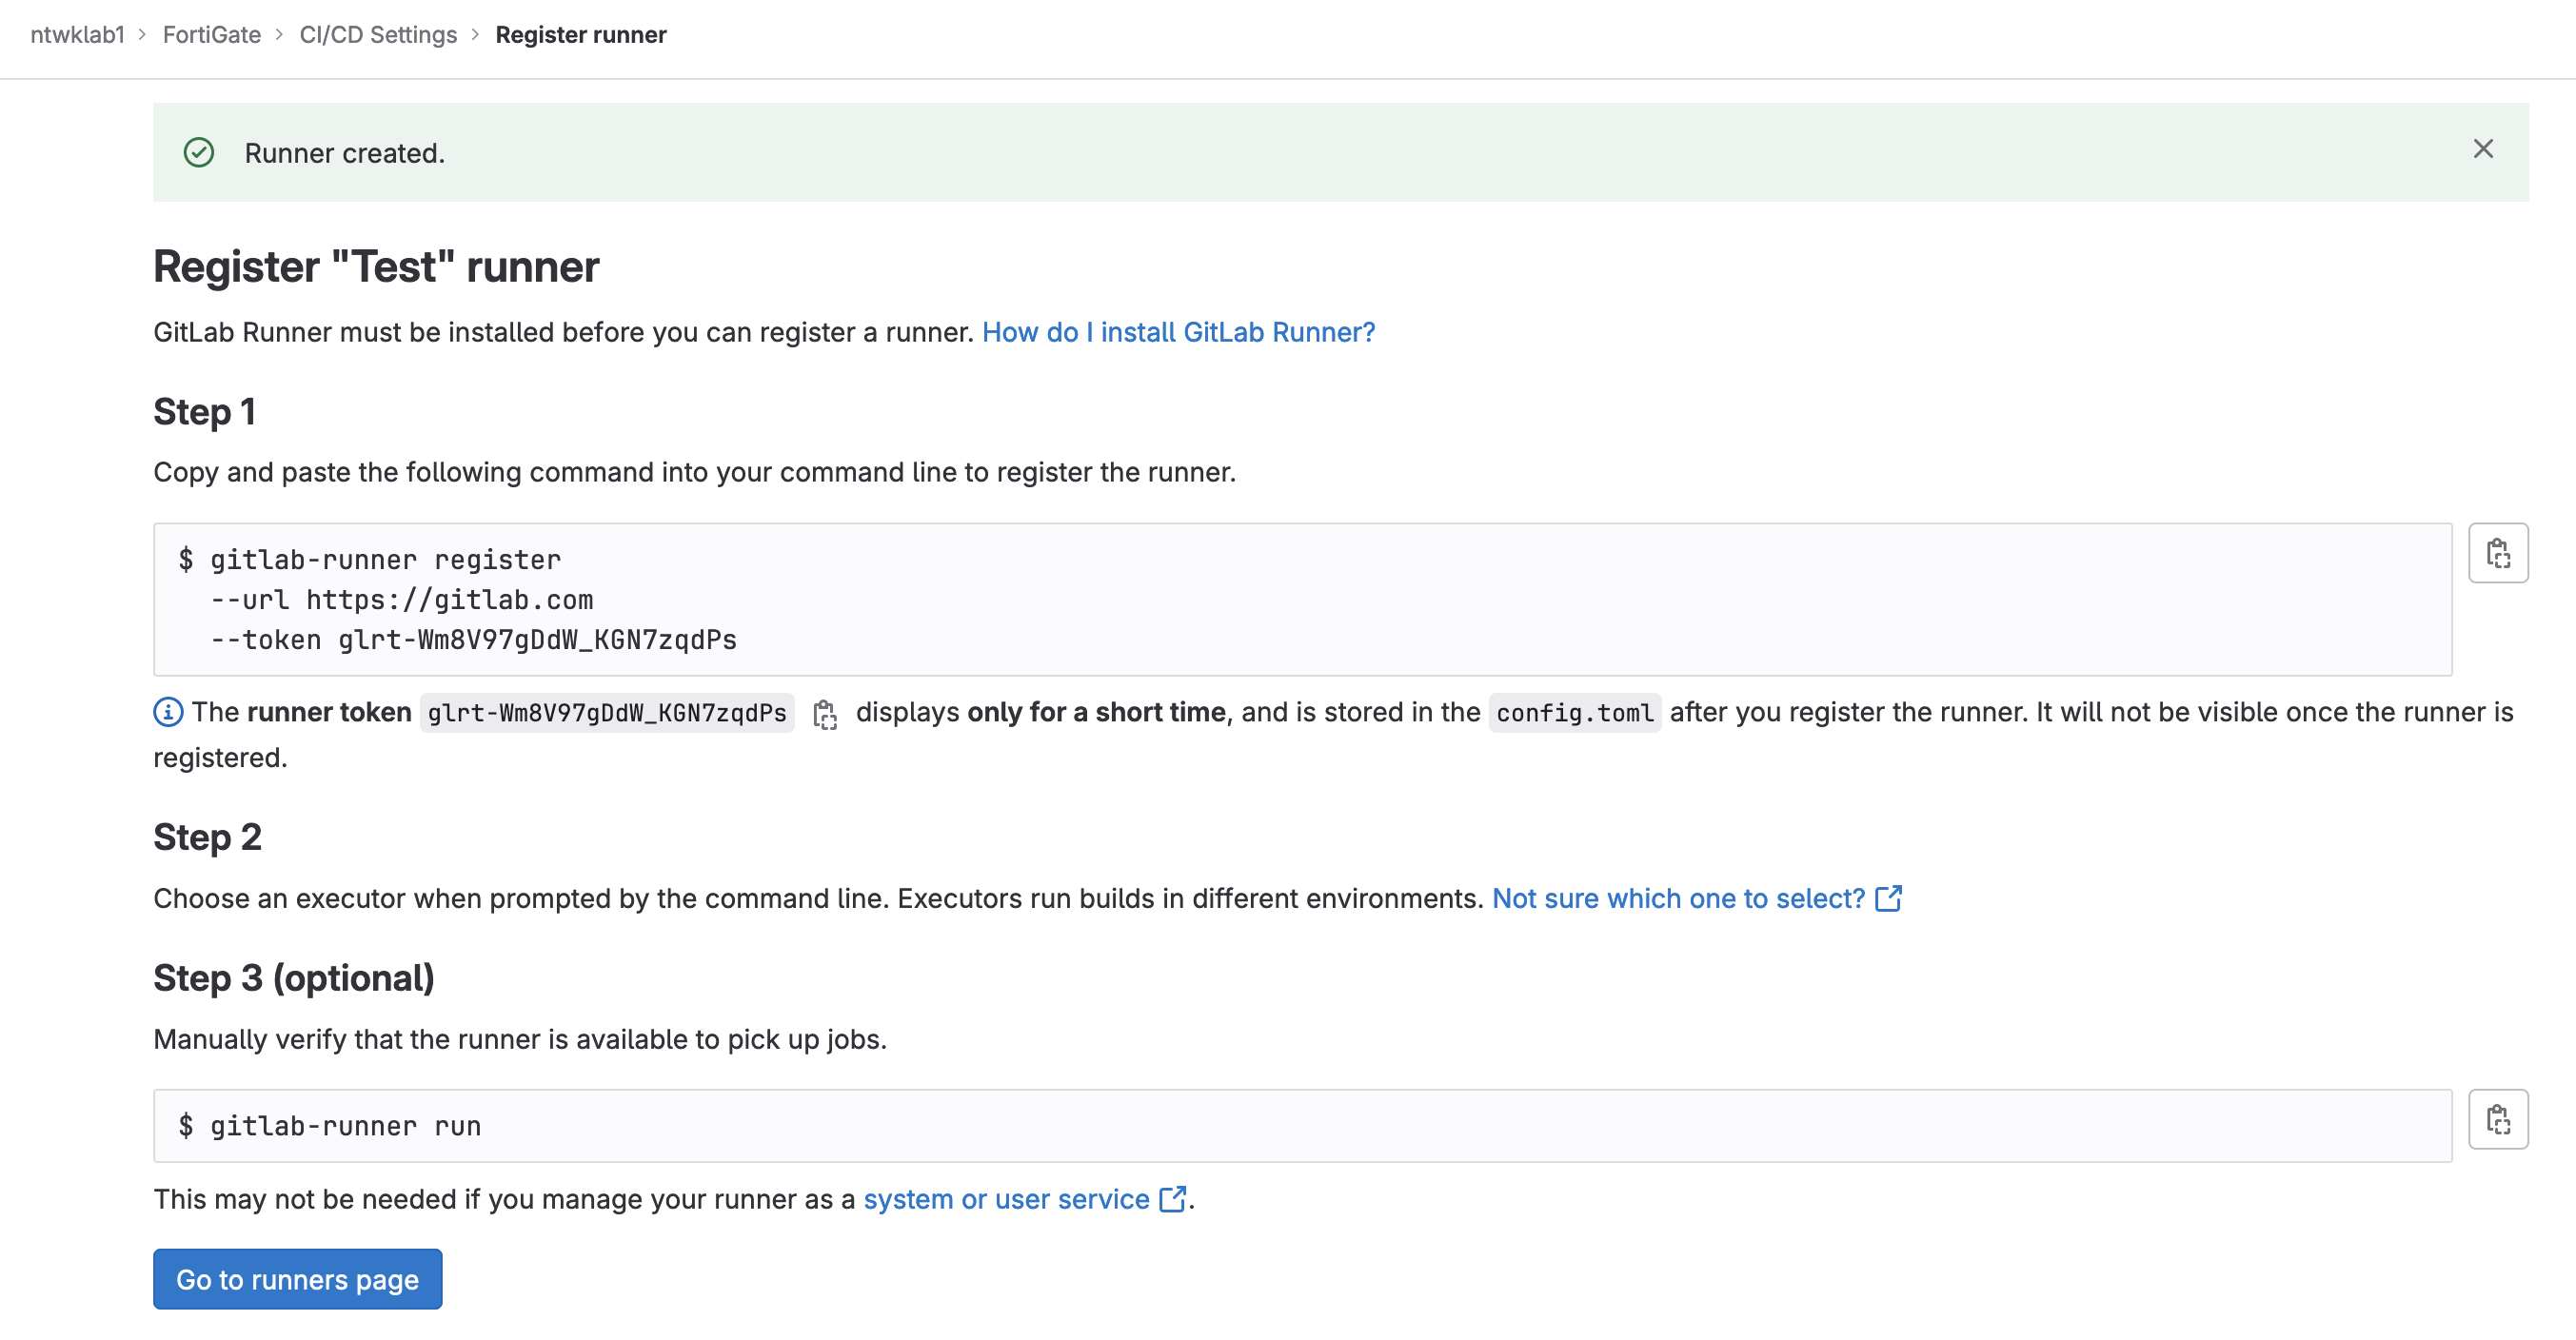
Once the runner has been created, you will be taken to a new page. That’s all for now. Keep this page open as the details are required. It will also confirm the runner has registered successfully once the message will appear below the Go to runners page button.
Create New Docker Network
As this will be running on a local network, the best way I found using Docker was to create a new Docker bridge network for GitLab. This will provide access to the local network.
|
0 1 2 |
docker network create -d bridge gitlab-runner-net |
|
0 1 2 3 4 |
sudo docker network ls NETWORK ID NAME DRIVER SCOPE a02618e9a869 netbox-docker_default bridge local |
Install and Configure GitLab Runner (Ubuntu)
Install the GitLab runner on Ubuntu.
|
0 1 2 3 4 5 6 7 8 9 |
# Download the binary for your system sudo curl -L --output /usr/local/bin/gitlab-runner https://gitlab-runner-downloads.s3.amazonaws.com/latest/binaries/gitlab-runner-linux-amd64 # Give it permission to execute sudo chmod +x /usr/local/bin/gitlab-runner # Create a GitLab Runner user sudo useradd --comment 'GitLab Runner' --create-home gitlab-runner --shell /bin/bash |
To run and configure the runner, use the following command. Not that there are extra options.
Name for the runner:
Executor: Docker
Default Docker Image: alpine
|
0 1 2 3 4 5 6 7 8 9 |
# Install and run as a service sudo gitlab-runner install --user=gitlab-runner \ --working-directory=/home/gitlab-runner \ --docker-network-mode 'gitlab-runner-net' \ --url https://gitlab.com \ --token <TOKEN> \ sudo gitlab-runner start |
The runner registration command creates the file /etc/gitlab-runner/config.toml. Inside this file are the settings.
|
0 1 2 3 4 5 6 7 8 9 10 11 12 13 14 15 16 17 18 19 20 21 22 23 24 25 26 27 28 29 |
sudo cat /etc/gitlab-runner/config.toml concurrent = 1 check_interval = 0 shutdown_timeout = 0 [session_server] session_timeout = 1800 [[runners]] name = "stef-VirtualBox" url = "https://gitlab.com" id = 24898178 token = "TOKEN" token_obtained_at = 2023-07-03T16:30:23Z token_expires_at = 0001-01-01T00:00:00Z executor = "docker" [runners.cache] MaxUploadedArchiveSize = 0 [runners.docker] tls_verify = false image = "alpine" privileged = false disable_entrypoint_overwrite = false oom_kill_disable = false disable_cache = false volumes = ["/cache"] network_mode = "gitlab-runner-net" shm_size = 0 |
This will now show that the runner has successfully registered in the GitLab page.
Create New Managed Terraform State
The managed Terraform state can now be created. Terraform knows where to look based off the bankend.tf file.
|
0 1 2 3 4 5 |
terraform { backend "http" { } } |
Inside the FortiGate repo is a file named .gitlab-ci.yml. This file is what will perform all the Terraform commands for the CI/CD pipeline. This is the default provided by GitLab, the template Terraform/Base.gitlab-ci.yml references the GitLab managed terraform state and will create this file automatically.
Inside my .gitlab-ci.yml file, I have included variables for the FortiGate token. These tokens can be found in GitLab under: Settings >> CICD >> Variables. For more details, I have created a post that walks through the process.
The Terraform state is created when the pipeline first runs. The pipeline will run when something is changed inside the repo by default.
|
0 1 2 3 4 5 6 7 8 9 10 11 12 13 14 15 16 17 18 19 20 21 22 23 24 25 26 27 28 29 30 31 32 33 34 35 36 37 38 39 40 41 42 43 |
# To contribute improvements to CI/CD templates, please follow the Development guide at: # https://docs.gitlab.com/ee/development/cicd/templates.html # This specific template is located at: # https://gitlab.com/gitlab-org/gitlab/-/blob/master/lib/gitlab/ci/templates/Terraform.gitlab-ci.yml include: - template: Terraform/Base.gitlab-ci.yml # https://gitlab.com/gitlab-org/gitlab/blob/master/lib/gitlab/ci/templates/Terraform/Base.gitlab-ci.yml # - template: Jobs/SAST-IaC.gitlab-ci.yml # https://gitlab.com/gitlab-org/gitlab/blob/master/lib/gitlab/ci/templates/Jobs/SAST-IaC.gitlab-ci.yml variables: TF_VAR_FORTIOS_ACCESS_TOKEN: $FORTIOS_ACCESS_TOKEN stages: - validate - test - build - deploy - cleanup fmt: extends: .terraform:fmt needs: [] validate: extends: .terraform:validate needs: [] build: extends: .terraform:build environment: name: $TF_STATE_NAME action: prepare deploy: extends: .terraform:deploy dependencies: - build environment: name: $TF_STATE_NAME action: start |
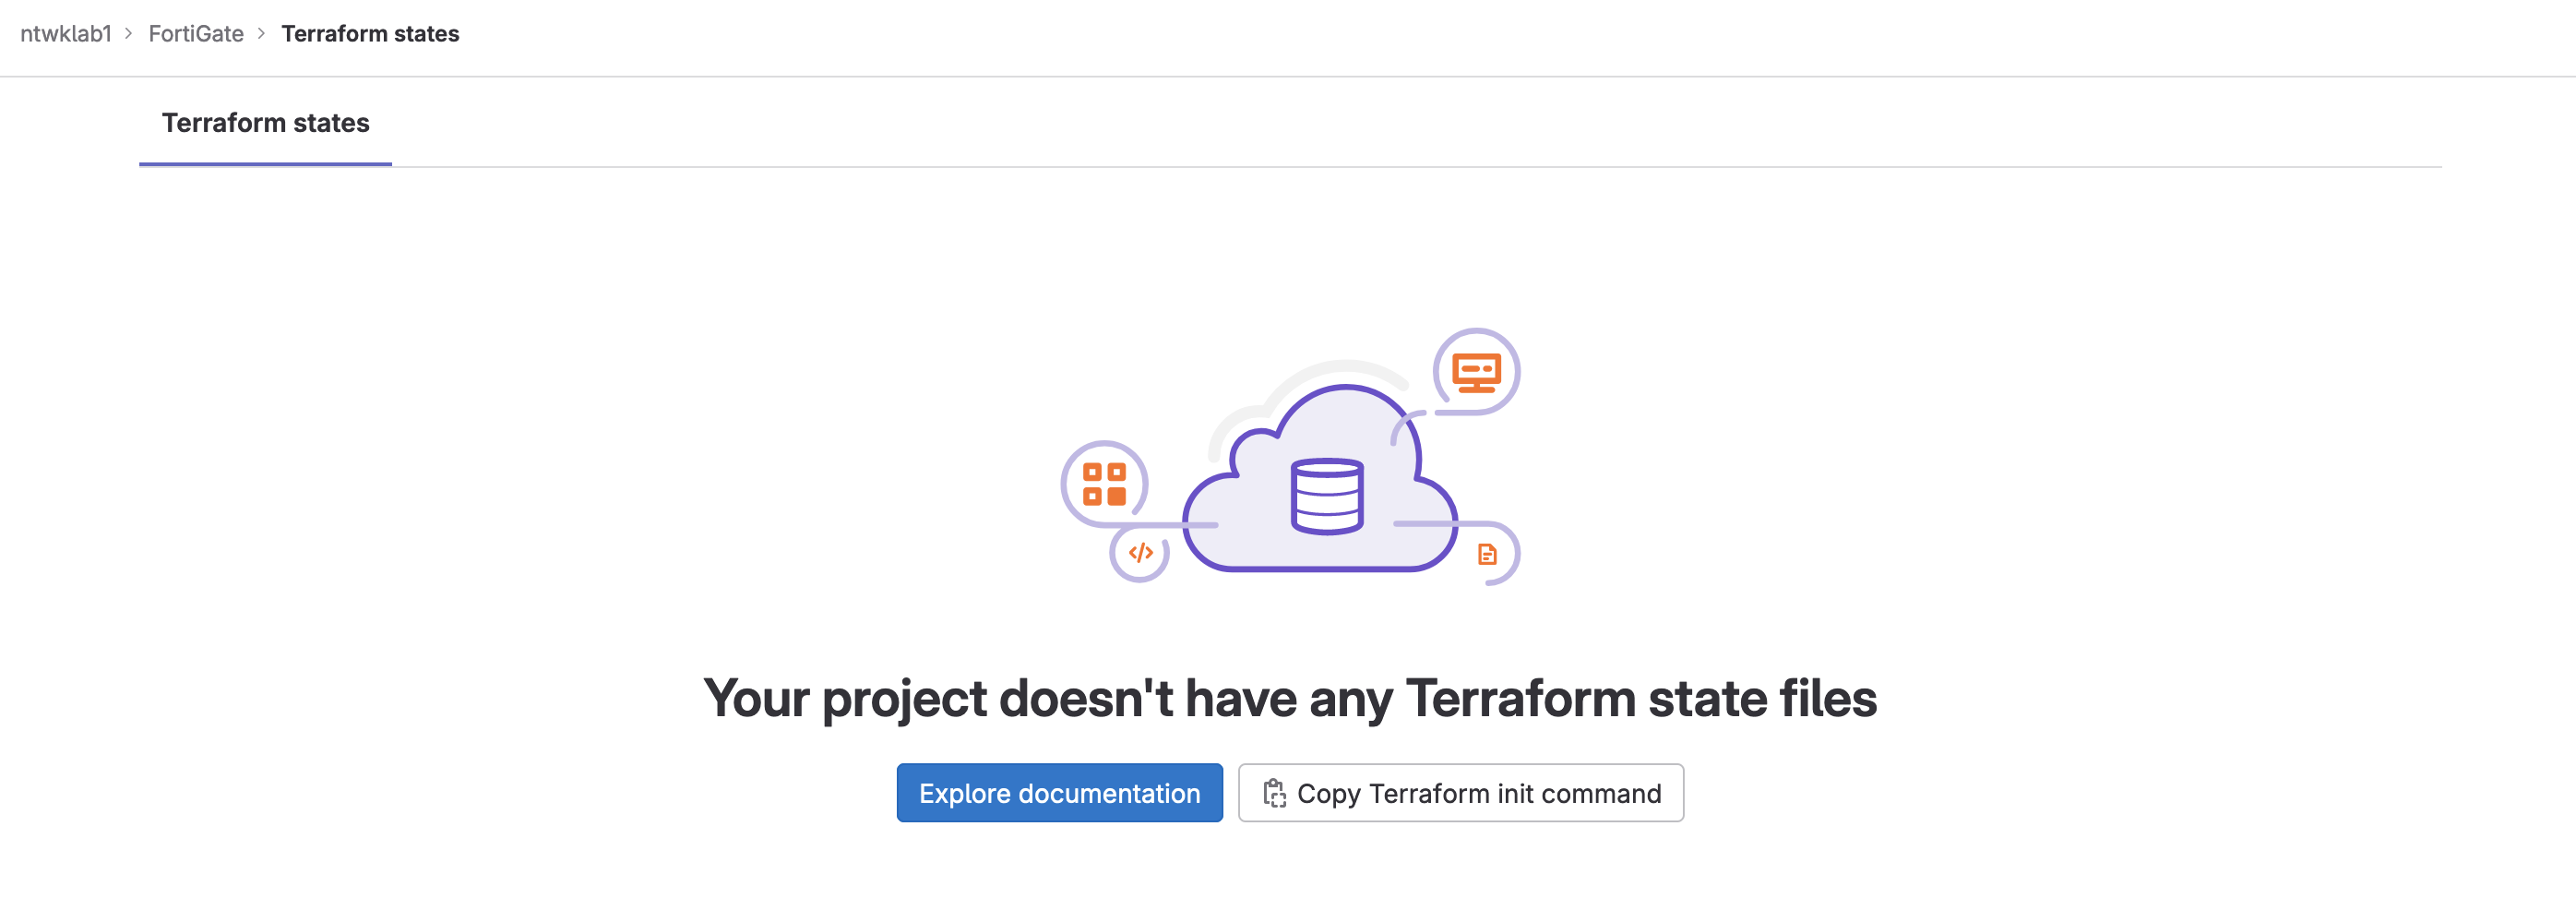
To locate the Terraform state, navigate to: Operate >> Terraform states.
Currently, there is nothing in here. That will be populated in the next stage.
Test
The test step will be running the pipeline and seeing the Terraform state file created, and configuration apply to the FortiGate.
Make any changes as required. Push the changes back to GitLab. The pipeline will automatically run. If there are no changes to be made, the pipeline can be run manually.
|
0 1 2 3 |
git clone git@gitlab.com:ntwklab1/Fortigate.git git push |
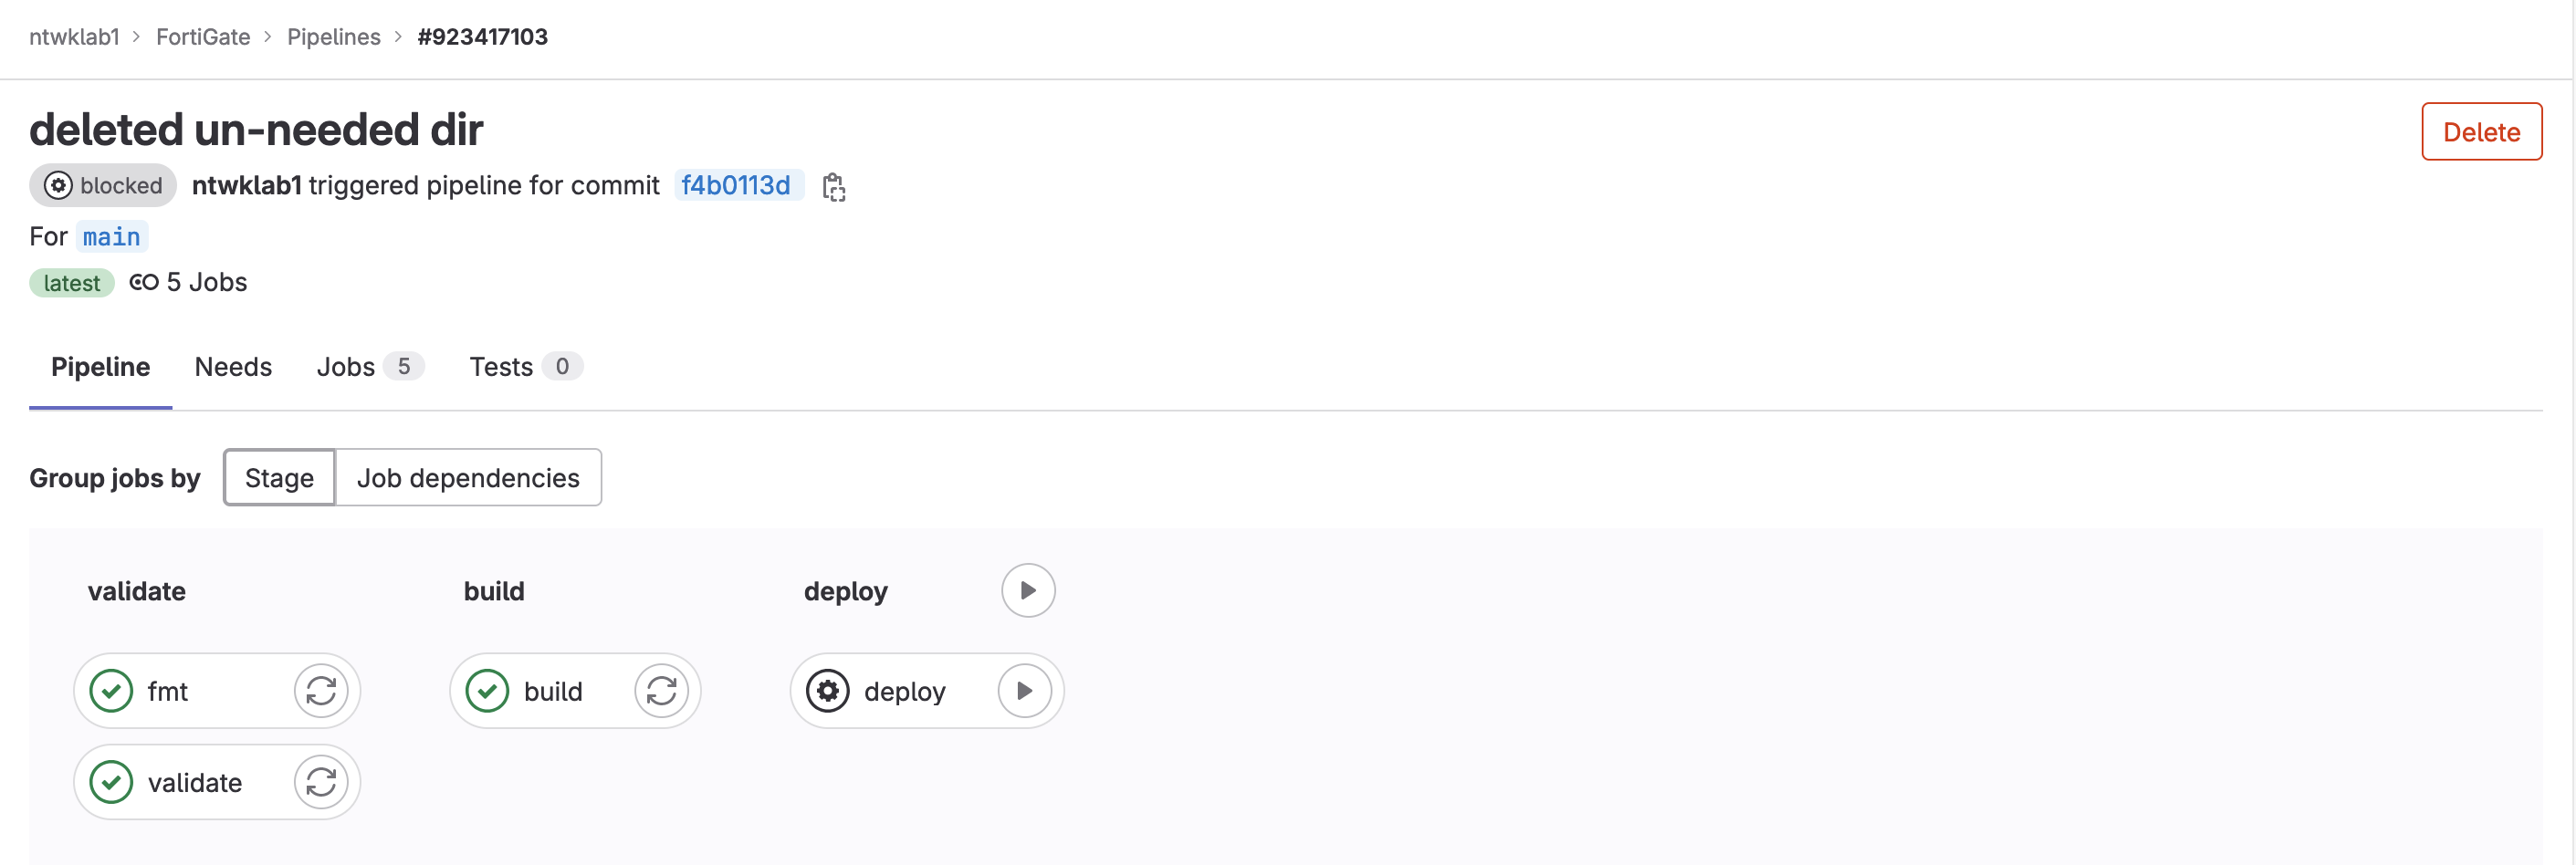
To run the pipeline manually, navigate to: Build >> Pipelines >> Run Pipeline

The pipeline has run with the changes I made. It is pending manual intervention to deploy the configuration.
Going back to the Terraform state (Operate >> Terraform states), the state file will be present, named default.
